Party Appetizer
December 15, 2011 by Lynn
Filed under Featured Content, Snacks/Appetizers, Yummy Food
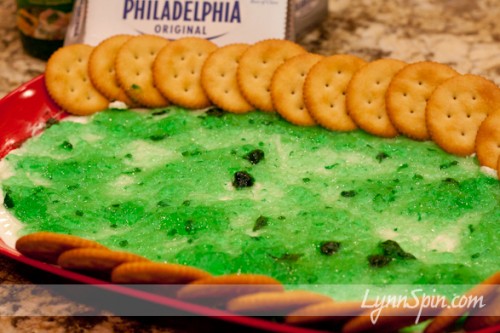
This might look a little weird, green and all. But! Don’t let that get to you, it is GOOD! And, I am not the only person who thinks so. I recently took this to an ugly sweater Christmas party and it was gobbled up fast. And it is fast and easy to whip up before a party when you running around crazy to get ready. I think that is called perfection. 
What cha’ do?
Well buy some cream cheese, Reese’s mild Pepper Jelly, and Ritz crackers.
Spread the cream cheese on a platter, then spread the jelly on top. Set some crackers around the rim and head off to your party!
Go party with your badself!!
Photography Backdrop
December 15, 2011 by Lynn
Filed under Crafts, DIY, Featured Content, Photography
For all you amateur photographers and momtographers out there- You will love this!
I hope it helps you take some fun pictures this holiday season 
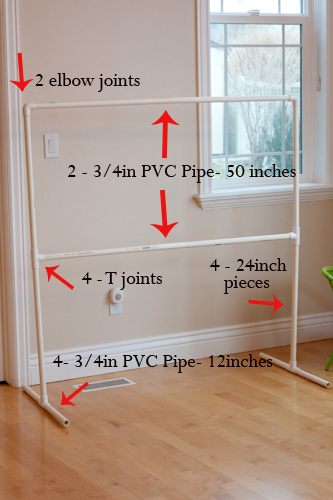
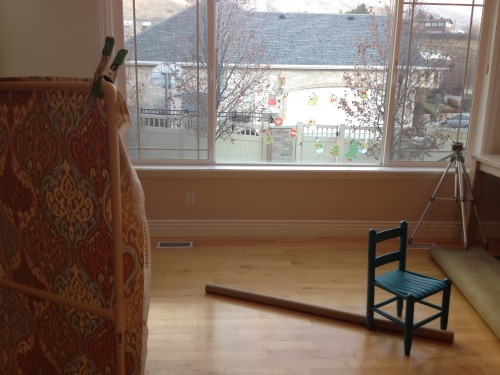
I was asked to take some indoor photos the other day, since it is FREEZING!! here in Utah lol! So… I needed a backdrop! I was mulling over how I was going to make this work and decided I needed to make a PVC pipe frame to hang some fabric from. I have tons of upholstery fabric laying around from projects I have not yet done 😉 It was nice to finally use it for something. Turns out thick upholstery fabric makes for a really good backdrop. And, I got all the PVC pipe I needed for about 3 dollars.
I used 3/4 inch PVC pipe, 2 elbow joints, and 4 T joints. The two cross pieces are 50 inches long. The pieces going up the sides are 24 inches long and the bottom pieces helping it to stand are 12 inches long. This was a great size for little people and 54in wide fabric worked perfectly, but it you need to make this bigger I would use 1in or bigger PVC pipe to make it stronger.
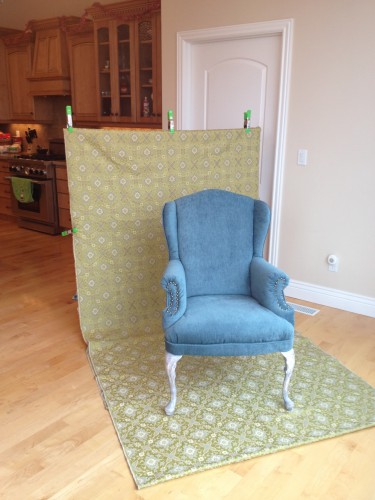
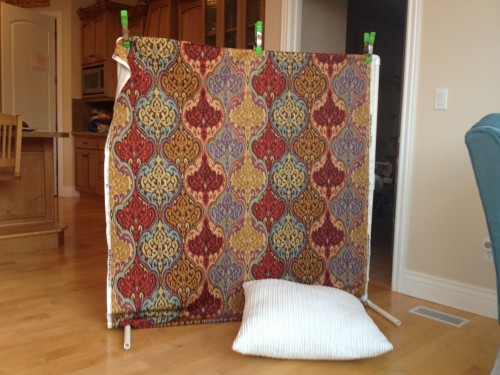
Then how to hang the fabric? I didn’t want to do anything to the fabric, in-case I did get around to those projects. Clothes pins? Curtain clips? Clamps! I thought about running to the store for one of those first two things, then I saw the hubs box of clamps in the garage. Waa laa problem solved!
Here is the finished product- I am pretty pleased how it worked out  And I can take it apart and store it for another day. It doesn’t take up much room, perfect!
I put it in front of a big window for natural light.
Here are the pictures from the shoot that day. ADORABLE kids!
I am SOO glad it worked out!
We then went outside for a few minutes against the brick on my house. Use what you got! 😉
I love babies that are sad, but just can’t help but smile when someone smiles at them. This kid was SOO cute! Such a smiley guy 
What a pouty lip! He was so done, but kept smiling for us. What a sweet boy.
Making a Table- The Process
December 15, 2011 by Lynn
Filed under Decorating, DIY, Featured Content, Home and Garden
I really really wanted a new dinning room table when we moved. But, a few things kept taking priority over buying a new table. Espeacially since the tables I liked where around 1500 to 3000 bucks. hmmm…. Dev (the hubs) wasn’t really feeling that. So for my b-day he told me he would make one before Thanksgiving.
Uh… he has never made a table before! What to do… Thinking thinking. I started to cut out pictures and read blogs about what I wanted. Then like a present the Lowes project magazine came in the mail with instructions on how to build a table. It didn’t look to hard.
We went and bought all the wood a week later.
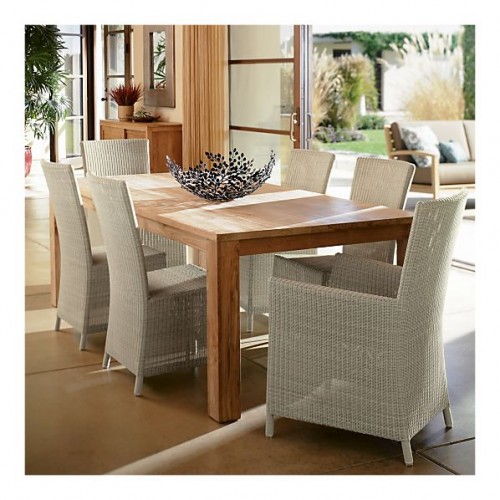
This table from Crate and Barrel is one I have had my eye on for years. We modeled our table after it.
I told Dev that if we were going to build our own table I wanted to do it for under $100. And! I wanted it to fit 10 people. He liked my challenge.
We bought pine 2×6 x8 boards for the top
2×4 for the ends of the top and the frame
4×4’s for the legs
We did a few things differently than the Lowe’s directions. But, it helped to have an idea of how to start. Mostly we used the directions for the frame (which I’ll share below). We wanted the table top to be seamless. So instead of the Lowe’s way, we changed it up a bit. We started by trimming up the sides of the 2×6’s to make them flat. 2×6’s from the store are slightly curved.
After cutting those we used a biscuit joiner to cut into the sides of the wood. We put biscuits and wood glue between the boards and clamped them together, adding one board at a time. The table was large so we used pipe clamps to hold it all together.
We planed the ends then put the end board on using a router to cut a tongue and groove joint. Then glued it and clamped it again with the pipe clamps.
We then used our hand planer to smooth/even out the top. After that was done we used 100 grit sand paper on the electric sander to smooth it out more. Ideally you would want to use a planer and run each board through it before starting to put the top together. OR! You could put the top all together and find a cabinet maker who would let you run the entire piece through one of their large industrial planers.
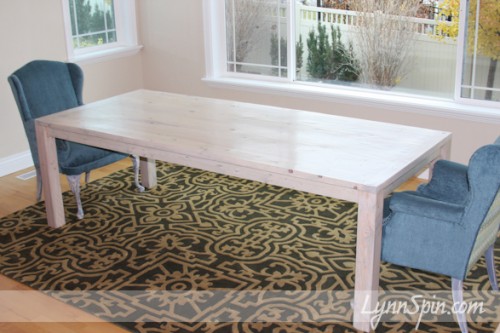
While the glue was hardening we picked out stains. I wanted a beachy farm house table feel. So we decided to do a gray stain with a white wash over the top.
Here is a link to the Lowe’s table directions that we used for the frame. Click HERE
We flipped the top upside down and started building the frame right on to it.
We used a pocket hole jig to join the top to the frame.
We changed the placement of the legs and moved ours to the edge of the table top, and secured them with lag screws. We inset only the apron piece.
Then we flipped it back over and filled some of the knots and holes with stainable wood filler.
You should probably use gloves here….oops
After that was dry we sanded the entire piece with 220 grit sand paper.
Before staining the table, we prepped it with Minwax Pre-Stain Wood Conditioner. This helps a lot!! It helps you get an even stain, avoiding ugly blotches.
I then stained it with a weathered oak stain.
After that was dry I went over it with a white wash.
To finish the table we applied 4 coats of a water based polyurethane.
We built a solid table for under $100 dollars in less than a week. AND! It seats 10 people.
We already have plans to build another one! Ha, I know, we are crazy. But, we had a ton of fun doing this project together. I love my man.
This table might be for sale soon, if you want it let me know 
The next table will have turned legs, with a darker stained top and painted legs. I am excited to do it again  Stay tuned for that one sometime in January 2012!
Please leave me some comment love! 
Monday Mom Thoughts- IS THAT POOP?!!
December 12, 2011 by Lynn
Filed under Featured Content, Mom Thoughts
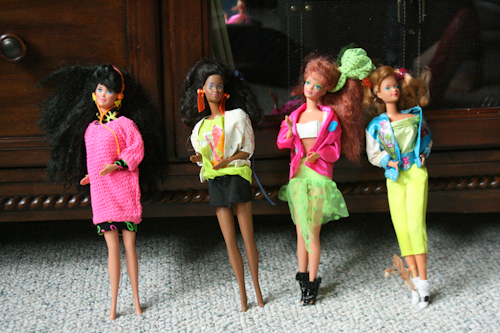
A while ago my mom cleaned out her attic and asked me if I wanted all my old barbies. We went through the boxes of them laughing and walking down memory lane. Charlie was with us and thought they were super cool, so we set a few aside to mail home. Even though, I vowed years ago I would never let my kids play with barbies, oh well. We took a few of the regular ones, we took a sea world one with a whale, then the Disney ones too. Had to take those Disney ones too. Charlie was in heaven.
Remember these guys?
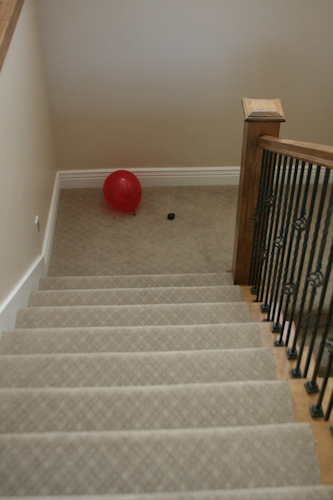
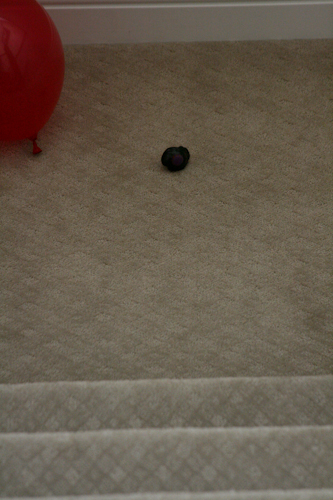
You might be thinking, what does this have to do with poop? Well one day after the box of barbies arrived in the mail I noticed something strange at the bottom of the stairs.
Could it be!??!! I stopped, stared, dreaded…. is that poop? Did Beck take off his diaper and accidentally poop while I wasn’t watching? Oh man…. I grabbed some stuff to clean it up and walked down the stairs. When I go a little closer I realized….
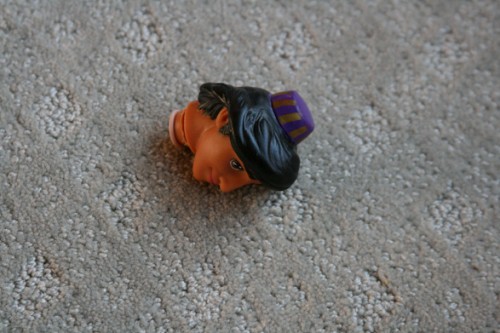
It was just Aladdin’s head. Relief!! Well, then where is his body?
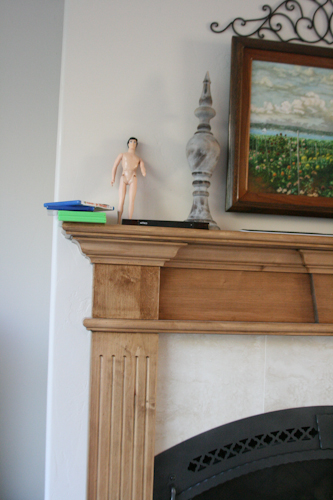
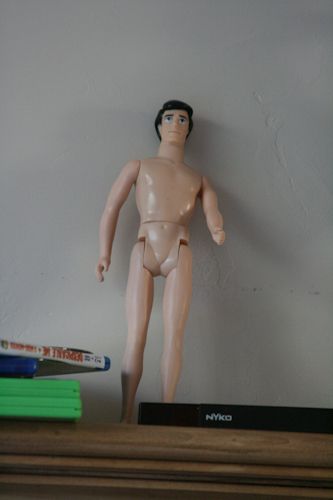
Well, I didn’t find his body. But! I did however find Prince Eric’s
Standing buck NAKED on my mantel. Nice Eric…. real nice.
I am starting to remember why I don’t need more toys running (naked) around my house. Especially barbies… Oh well. C’est la vie
Angels from the Thrift Store
December 7, 2011 by Lynn
Filed under Christmas, Crafts, Featured Content, Holiday Crafts
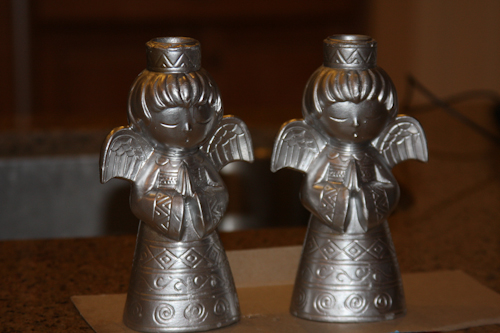
These angels where at Savers for 2 dollars each.
They needed a little Lynn love, so here is what happened. I wanted to give it a silver and gold patina look. I sprayed them silver.
Then I attempted to put some gold leaf on them. I just didn’t love how they turned out.
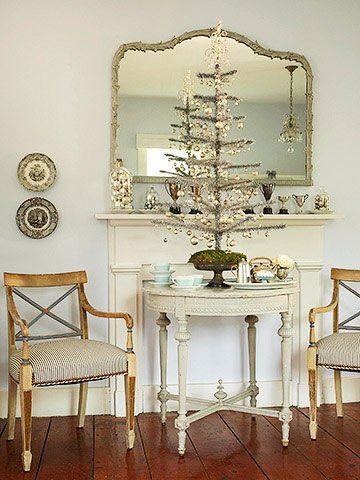
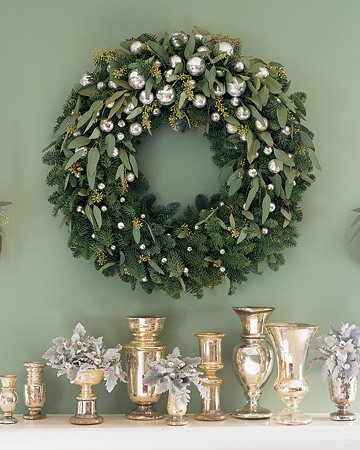
Even though this look is kinda popular right now as seen in these beautiful pictures.
picture from Better Homes and Gardens.com
Picture from Martha Stewart.com
And from Patina Green Blog
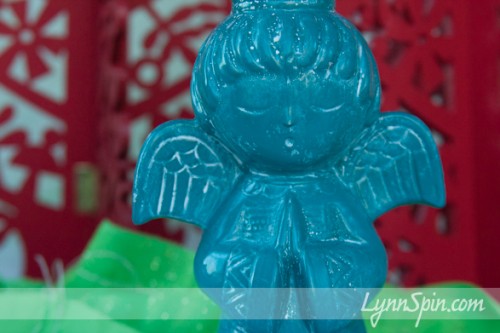
I just wasn’t diggin’ it. And I am mostly a green and red Christmas decor girl. So… I tried again. This time with teal spray paint. Then a little white wash stain.
I painted the stain on, then wiped it off after a few seconds.
What do you think?
I am loving red and teal lately.
Large Fabric Wreath Bow
December 6, 2011 by Lynn
Filed under Christmas, Crafts, Featured Content, Holiday Crafts, Sewing
Fabric bow making 101. You can use this tutorial to make a fabric bow of any size. Just scale it up or down depending on your needs 
Here’s how I made this BIG fabric bow.
(if you hate to sew, don’t like to sew, or don’t own a machine, or have one you can borrow- bust out the hot glue gun. He is always helpful  )
)
I started by cutting a piece of red linen 16 inches wide by 35 inches long. I folded it in half long ways and sewed the ends together.
I then creased it so the seam was in the middle on top and ironed it flat.
I then folded the ends in to meet in the middle.
I sewed down the middle to hold the ends in place.
I took a piece of thick thread, wrapped it around the middle of my bow, pulled it tight, and tied a knot.
waalaa bow….but we are not done yet!
Straiten it out a little and make sure the sides are even.
Then I cut another piece of fabric 8 long by 6 wide. I did the same steps of folding in half, sewing together, then ironing with seam on top.
I hot glued that piece over the thread in the middle of the bow.
I then cut out 4 more pieces to be the ends of the bow that hang down.
I have the pattern I made for those; if anyone wants it e-mail me.
I sewed two together them flipped them right side out.
And I hot glued them on to the back of the bow.
Then I cut and sewed a piece for the wreath to hang from and hot glued the bow on to that.
Took about 30 mins. I’d say this is an easy project. AND I’d say “Go get crafty with your bad self! And pin me on Pinterest while your at it ;)” wink wink 
Here is the finished bow on the wreath I bought at Costco.
Monday Mom Thoughts
December 5, 2011 by Lynn
Filed under Featured Content, Mom Thoughts
It should read, “Monday Mom Thoughts, or the lack there of.” Yeah, especially for this post.
I was at my wits end with my kids the other day. The young women at our church were putting on a free baby sitting night. I WAS SOOO EXCITED! I could hardly wait till nap time so I could shower and start feeling cute for my hot date. But, then Devan called with bad news. He had to go help with the young men’s activity at church…date night cancelled.
I was so bummed and felt even more crazy knowing I would not be getting that break I was sooo looking forward to. Why shower, I was going no where…blah… man!… Now I was getting snappy with the kids and was not being the best mommy I could be.
Charlie even sang a song that seemed to sum up my day. Her little ditty went something like this, “I love my mom sooo much, even though she is mean to me. mean mean mean to me, she is mean mean mean MEEEEAAANNN!” She was very happy when she sang this song. She does this a lot; where she expresses her thoughts of the day through song. But, the moment I heard it I turned around and my jaw dropped. “I suck,” is all I could think.
I sat silently for a few moments then asked Charlie for a hug. She so willing gave me one. I love that girl, even when she sings truthful songs about me. lol. We sat for a few minutes hugging. A hug was just what I had needed ALL day. Silly mama, silly me.
Here is a picture from this bad day. I was eating lunch when I got up to get some milk for Charlie and Beck. I decided to pour myself a cup too. I then sat down and Miss Charlie pointed out, “Mom, you have two cups of milk! That’s silly!”
I looked at my cup(s), she was right. When did I pour the first one? A few moments ago. Some how in those 5 mins I decided that I was thirsty and needed a drink of milk. (which I already had but forgot about RIGHT IN FRONT OF MY FACE) Oh geez….
I grabbed some oreo’s and made it worth my while. What a day.
MOM THOUGHTS AT LYNNSPIN.COM
Friday Feature- Today’s Fabulous Finds- Snowmen
December 2, 2011 by Lynn
Filed under Christmas, Crafts, Featured Content, Holiday Crafts
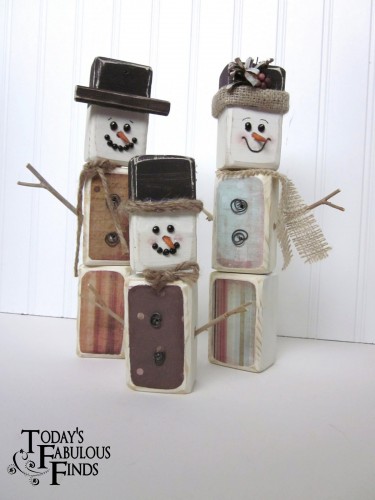
One of my close friends pinned these on Pintest and I saw them and knew I needed to make them! TOO CUTE!
What a great idea Janet over at Today’s Fabulous Finds Blog had.
Check out her fun blog and see how she made her snowmen by clicking HERE
And I had a ton of wood 2 x 4’s left over from building our dinning room table. Click HERE to see that. Anywho… My buddy came over after we had both put our kids to bed and we made these adorable snowmen. I made 4 because I knew Charlie would wonder where her or Beck was. So here are my four that I made.
We did ours just a little different. I didn’t have dowels, so we just used wood glue to stick them together. We used beads and puff paint for the faces. We hot glued the arms and decor on.
Thanks for the fun idea Janet! And thanks for helping people to get Crafty!
My Gift to YOU- Free Printables!!
December 1, 2011 by Lynn
Filed under Art, Christmas, Featured Content, Holiday Crafts, Typography
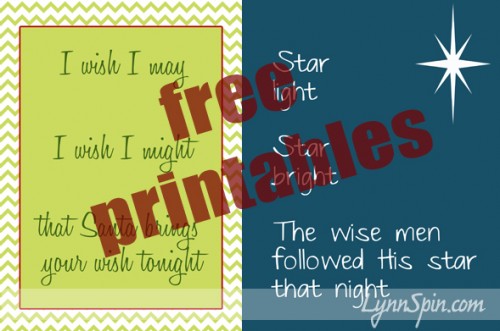
I have been thinking about these for a while. And I hope they can bring your house some Christmas cheer 
I have had so much fun crafting with you this year and sharing ideas. I hope you have a GREAT Christmas!!
You can download these by clicking on the links above each picture. This will take you to BOX.net where you can safely download the larger image straight to your computer.
These are all 8 x 10’s. I suggest printing at Costco. But, remember to click “Do Not Auto Correct” before check out. 
Copyright- Lindsay Muir
This tree one is 11 x 14
Much Love!
-Lynn
If you re-post this please give Lynn Spin a shout out and post my button on your blog somewhere. Thanks! 
DIY Beachy Wood Starburst Mirror
November 30, 2011 by Lynn
Filed under Crafts, Decorating, Featured Content, Home and Garden
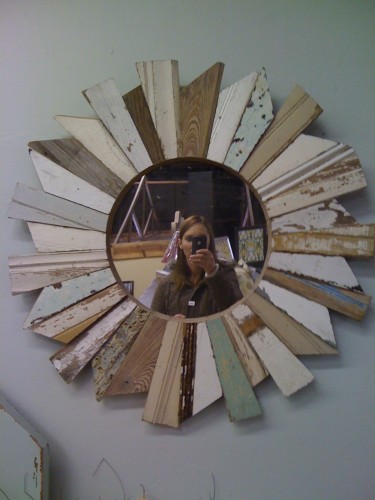
I saw this mirror in a store I love here in Utah, but it was $395.00. I just don’t have that kind of cash right now. I showed the picture to the hubs and he said that “You could totally make that.” “I”, “Me, Lynn” “BY MYSELF” could totally make it. Uhh… what?! He said he would give me tips, but I was pretty much on my own with this one. OK. Hear me ROAR ladies. That’s right, I used the saw, the man tools, and I got crafty with MY BAD SELF!
My sister in-law and I decided we would both make one of our selves. SO! Here is how we recreated this beauty.
We started by collecting wood that looked reclaimed, like the wood on the frame. We took some wood out of a friends yard, a few pieces off a really old looking pallet, and went to the Re-store to buy a few left over molding and other wood boards. I also bought a 4ft pieces of cedar from Home Depot. We started by cutting the wood boards between 6-9 inches long. We cut the tops at angles between 20 and 45 degrees. We then cut, using the chop saw, and angle from the top to the bottom of the wood.
We each laid out the pieces to see how we wanted it to be.
We first cut out all the pieces that would be “kissing”. There are six sets of the ones that face each other, “kiss”. And then just like a puzzle we pieced them together to be the overall size we each wanted.
After this we numbered them on the back side. Then transferred them into my laundry room for painting/distressing.
We used multiple painting techniques to give them each some character. We used 220 and 100 sandpaper to rough some of the paint up. We did a crackle finish on two, with silver underneath and blue on top. And I’ll talk about that more towards the end of the post. But, we had a fun time play with different techniques.
After it was dry I started to put it together by glue the sides of each piece together.
I clamped a few of them together to help make a stronger hold.
After it was all nice and glued. I added a few small pieces of thin wood to the back for added support.
Okay, maybe more than just a few….
This is going above my bed. I wanted to make it strong  I am sure there is a better way to do this, but this is the best thing I could think of.
I then placed some heavy books and stuff on top of it till it was dry.
When it was dry and nice and strong I flipped it over to add the mirror. I had a left over mirror from my gallery wall. I took one of them down from the wall. Cuz the one next to the M, it made it look like “MOO” and it was driving me nuts. 
So I had the mirror and it was wrapped in jute. Great for the look I was going for.
I would have glued or nailed the mirror on, but I decided instead to use some heavy duty Velcro. That might seem weird, but it works great. And if it breaks or I need to remove it for some reason, I can easily take it off.
I added some picture hanger hooks and wire to the back and I AM DONE!
I love the look  It totally goes with my “beachy barn look” I need to find a better name for that…. any suggestions?
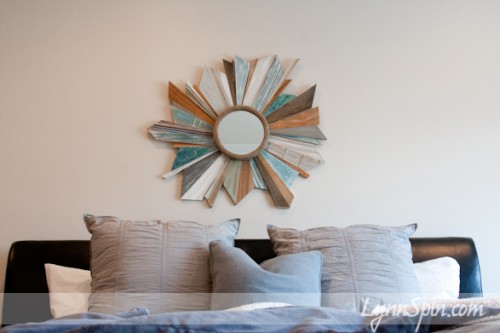
Here it is all done hanging above my bed!
It’s not a perfectly shaped as the one I saw in the store, but I like it this way.
Oh! And by the way. This starburst mirror did not cost me $395, it cost me about $10!!!
Here is the crackle I mentioned above. I wanted the metallics to be subtle.
Mostly we painted, sanded, painted more, sanded more.  It was all an experiment.
On both the white above I paint a few different colors, let it dry, then sanded with 220 sand paper. That was already white then I started. The blue one, I painted blue then sanded, then added a navy blue glaze, then sanded again. I white washed the thin one next to the blue one. A few I left natural. Mostly the cedar ones.
I just added the blue to this already white board then sanded with 220.
Some we dinged up with a hammer or nails.
We also added a little gold leaf to others. You can’t see it very well in the pictures.
This was a fun project. Now I need to work on that pillow situation 😉
Always a project at my house 
Always getting crafty with my bad self!


