The Road to LaLaLand
October 7, 2011 by Lynn
Filed under Crafts, Featured Content, Kids Crafts
We have a huge unfinished basement that was being unused. A total waste of space. The hubs and I decided to make it into a playroom for the time being. We put up half -wall dry wall all the way around the room, to keep the kiddies safe. And now we are beginning to make it a fun room. The first step so far was our road. Now that we live in Utah and won’t be able to play outside everyday like we could in San Diego; I wanted a place to ride bikes in winter. Hence, “the road.” Here is the duct tape road I made in the basement.
Making my space work for me and my fam-a-lama.
There’s a curvy and straight side to the road.
Making Envelope Pillows
October 4, 2011 by Lynn
Filed under Crafts, Featured Content, Sewing
Today I made two envelope pillows and I am going to show you how to do it too. It is easy! And no zippers to bother with. I have been putting this project off because I was a little intimidated. But, thanks to my new sewing machine and my sewing classes that came with it I am feel’in good ladies! These pillows took me 3/4 of Toy Story 3 to complete. Sooo…. yes, I bribed my children with a movie today, lol. No worries I took them to the park before nap time. It’s all good. 
Here we go!
I like to buy pillows at Ross then take out the insert. It is a cheaper way to buy a nice feather pillow and you get a cover to use at a pattern. I can then just lay down the original cover and cut around it about 1/4 wider that it is. If you already have a pillow insert, measure it and cut your fabric 1/4 inch wider as well.
I cut the front piece following the cover. Then for the back fabric I cut them the same width, but added 8inches to the length. I then cut these pieces in half making them 19.25 by 13inches. I have 2 of those per pillow.
On the sides of the back envelope pieces that will be showing I folded them under and sewed them to have a nice finished end.
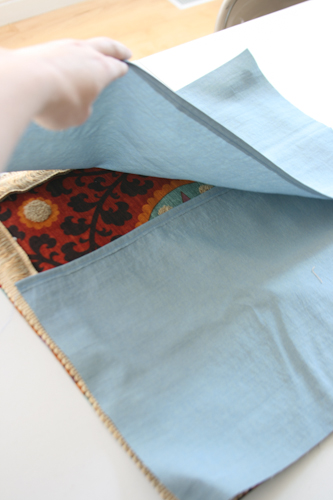
Now I laid down my front piece face up, put the trim on that sitting inside the pattern, and then laid the back envelope pieces face down overlapping each other.
All the parts you want to see when you are finished will be hidden inside your little fabric sandwich. Pin it all the way around. Make sure your trim stays in place.
Sew all the way around make sure you are catching your trim evenly.
Then cut your corners down just a bit.
Flip right sides out. Insert your pillow.
I if you have trim like mine, make sure you pull out the tread that it is holding the little treads together. Best to do this after you sew; to keep it from getting sewn under in the wrong places. You can just snip the tread and gently pull it off. Then play with it a little to get it to be fuzzy.
And… da da da YOUR DONE!
These pillows will go on different chairs, but I am not done with the chairs yet… soon hopefully!  Check back to see where they will be going.
Faux Animal Rug
May 20, 2011 by Lynn
Filed under Crafts, Featured Content
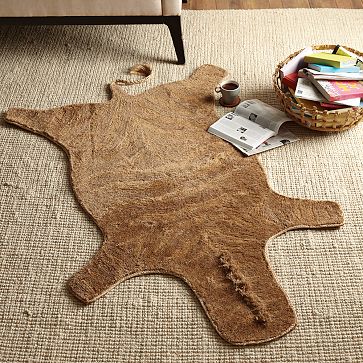
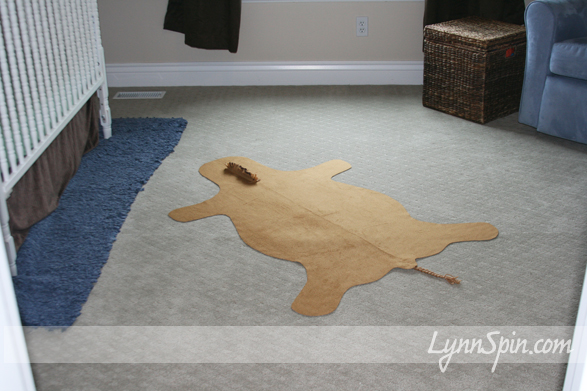
I found this rug online at West Elm.
I loved it and thought it would look awesome for Beck’s room, but, I don’t want to spend that kinda moola on a rug for a 1 year old’s room. So! I made it  I’m so cool
  It was another super easy five minute craft. Sweet!
Here’s how I did it.
I bought some fabric that wouldn’t fray with a thick back and I wouldn’t need to sew.
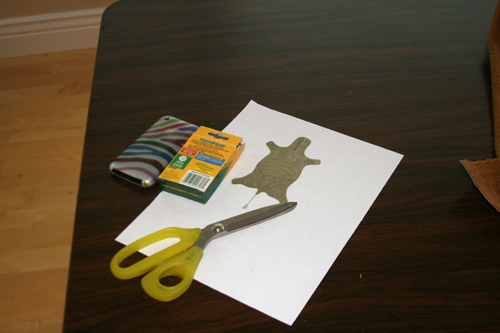
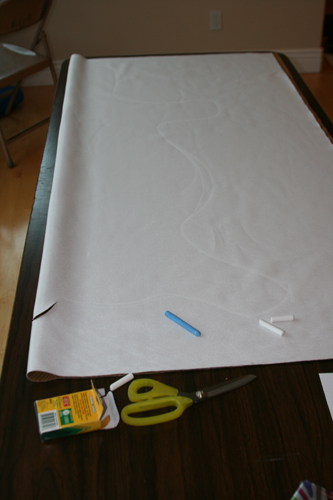
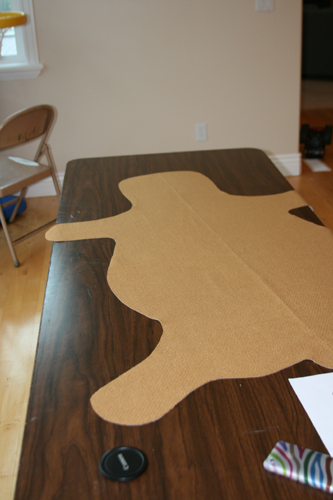
I printed out a picture of the rug. Folded my fabric in half, draw an outline with chalk, then cut!
The outline was in white chalk, so it’s hard to see.
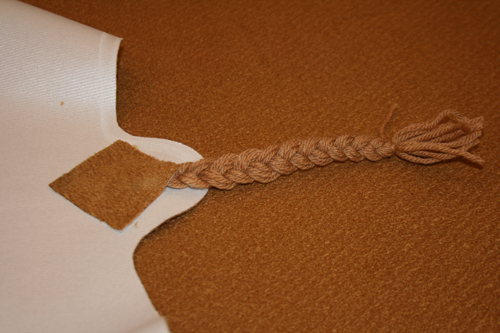
Then I took it to the next level and added a tail and a mane.
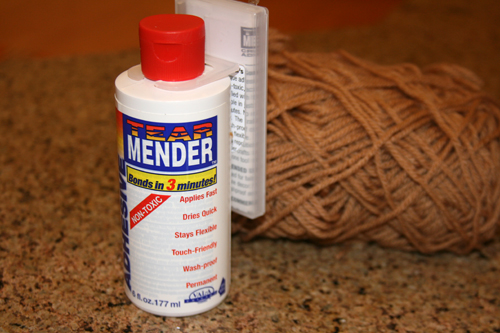
I used this-
Tear Mender, it’s great for creating without having to sew.
I braided some matching yarn and glue it on with the Tear Mender.
Then cut out some felt and glued that on too.
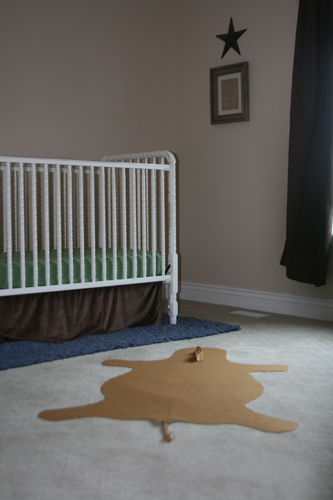
And waalaa!
One faux animal rug. I’m not sure what animal it is…looks like a horse.
Craft Break- Time to Laugh
May 15, 2011 by Lynn
Filed under Crafts, Featured Content
So I had a crappy Saturday. I’ve been working on a dresser I bought off KSL. And, I must have done something wrong on the very last step because the stain(that I spent hours on) started to come off as I applied the clear top coat. I was P-I-S-S-E-D to say the least. Then everything else that’s not perfect in life right now just seemed to snowball and I was in a full blow crying fit before my husband knew what was going on 😉 (He’s a good man, thank goodness) He listen while I threw a childish fit about how I had “totally messed the dresser up” “I miss San Diego, the beach, MY FRIENDS” , that I “Don’t have” this or that and blah blah blah whine whine whine and cry big tears. So, now that I have composed myself and realized I am not falling in to a never ending hole of doom and gloom, my dresser will be okay 
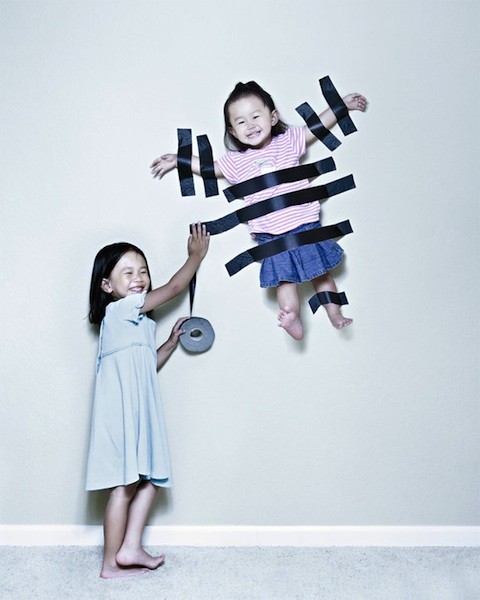
I would like to share these pictures with you, they make me smile.
I wish I could do this to my kids.
For Photographer info click here
What I try to do 
( Hopefully I share pictures of the dresser around Wednesday, maybe sooner.)
Iron On-Peel Off Wall Art
May 12, 2011 by Lynn
Filed under Crafts, Featured Content
This is sweet! Who thinks to iron fabric to walls?!! Well now you will.
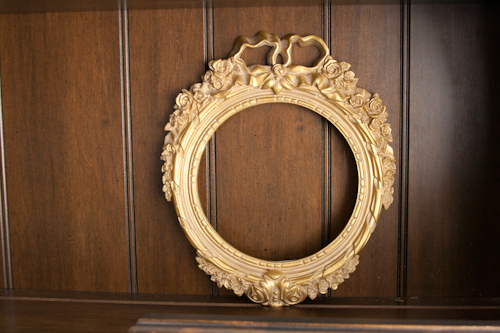
First of all, I am kinda a spray painting freak these days. I sprayed this frame that I found for $1.50 at the thrift store last week. Perfect for this room.
Then got started on my fabric butterfly. I found a butterfly silhouette online, sized it right, printed it and cut it out.
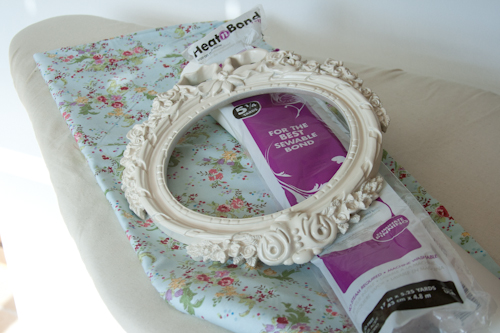
I applied (here’s the trick) HEAT and BOND to the back of my fabric.
Then I traced the butterfly image on to the paper backing and cut it out.
I then peeled off the Heat and Bond paper backing and ironed it straight onto my wall. Sooo easy!!
I am thinking I should have done a darker fabric, but oh well, it’s cute! That the cool thing though, I could peel this off and iron another one on it about two minutes.
Here’s a few pictures from the art I have made in Charlie’s room.
Find the painted dresser here.
And here’s how to make a silhouette.
I am hoping to get a little lamp to stick on the table between the beds and the bedding is in the mail. It will be so cute when its all done. P.S. those beds where mine and my sisters growing up. If you look close you can see where I carved my initials L Z in the wood. oops  And that cross stitch was given to my Grandma when my mom was born. It hung over her bed, mine and my sisters beds, and now Charlie’s bed. I love stuff like that.
Bath Paint for Kids
May 9, 2011 by Lynn
Filed under Kids Crafts
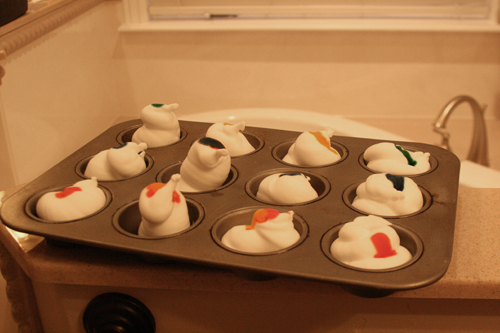
 We found this tutorial the other day on another fun blog and wanted to share it here too. My kids loved it! And it was super easy. Fun + Easy = Everyone is happy
All you do is:
- get some sensitive skin shaving cream.
- Spray it into a cupcake tin.
- Add a tiny dot of food coloring to each cup.
- Mix up well.
- Then let the kiddos paint away.
This idea was found at Meet the Dubiens Check out their blog, its full of great ideas for your kids.

Etching Glass How To
Etching glass may seem a little scary, but it’s actually very easy and fast. My favorite kind of craft!
Here’s a candy jar I am making for the hubs for Valentine’s Day. I etched “Be Mine” on it and filled it with a few different kinds of M&M’s. I am not going crazy this year for V-day, so I hope he likes it. He will probably just be happy I didn’t much spend money.  Men… hahaha
Here’s how to etch glass!
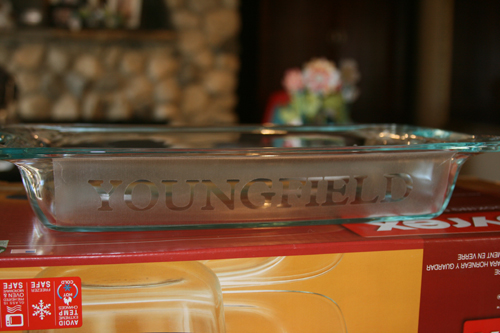
First find your glass. I also like to etch my pyrex baking dishes with my name.
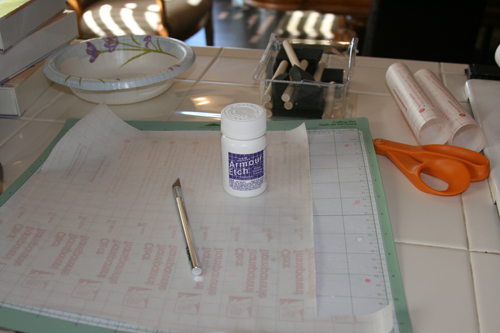
Next you will cut your letter’s or image out of clear removable contact paper. I can only ever find this at Walmart. If using my cricut, I place the paper side down on the mat. This way I don’t have to worry about flipping the image/letters.
I use the Plantin SchoolBook font when I cut the letters for my bakeware. I would cut at 1 inch for longer names, 1 1/4 for 5-7 letter names, and 1 1/2 inch for shorter names.
For “Be Mine” I used the Opposites Attract font at 1 1/2
To cut the contact paper I have my depth at 2, pressure 4 and my speed at 4. I cut all the way through the contact paper.
I think Armor etch works the best. If you live in San Diego, you can’t buy this at Michael’s anymore. You will need to go to Value Craft.
I then peel the paper off my cut letters and place them on my glass.
Then I put on gloves (cuz the armor etch will burn your skin, Yikes! Becareful!)
I glob the armor etch on to the cut out letters on my glass and let it sit for 10 mins. The bottle says it needs only 60 seconds. But, the longer the better in this case.
After it is finished, take it to the sink and wipe of the armor etch with a wet sponge.
Peel off the contact paper and rub with a dry paper towel.
You can still put your pyrex in the dish washer after you etch it.
I then filled my jar with candy, although lingerie would be fun too 😉
Done!
You can see it much better in person.
Fake flower hair bow How To!
January 20, 2011 by Lynn
Filed under Crafts, Featured Content, Hair Bows
I always feel like “hair bow” should be one word…. Any who! Welcome to fake flower hair bow making 101. Super easy stuff right here!
You need:
Fake flowers
matching 8 mm wide ribbon(optional)
gems or buttons
alligator clips (get get at Sally’s Beauty Supply or I like to get mine on e-bay)
And grab your hot glue gun!
Here’s how we start. Flip your flower over and pull it all apart. Don’t be afraid, it all good.
Now depending on the flower and how fluffy you want it , choose the layers you want on the flower. Then glue each layer back together with just a little dab of hot glue in the center.This flower I only used two of the layers. I can make 5 hair bows from this one flower. I like to put wax paper under the flower when I am doing this.
After you have glued all the layers/petals you want on your flower- glue the gem or a button in the center of the flower.
Almost done. Now you don’t have to do this part, but I like to wrap my alligator clip in ribbon. I think it looks nice, helps the clip hold on to the hair better, and helps the clip stay on the flower. I don’t do the entire thing, you need the part that slides in the hair uncovered or its too hard to get in the hair. Here’s how I do it.
I put just a little line of glue on the end of the ribbon. Don’t cut if off the roll yet. Then I open my clip and slide the glued part in on the top part of the clip; so the bottom prong is left uncovered.
There is a hole where some of the glue comes through and works well to attach the top piece of ribbon.
Once its in I fold the ribbon over the top and press together.
Then I glue around the top of the pincher part of the clip and just slightly on to the bottom prong.
Now I glue it to my flower.
Done! Wish I had a cute picture of this is someones hair….maybe later 😉
Kids Paper Pumpkin
October 13, 2010 by Lynn
Filed under Kids Crafts
Here is something to do with the kiddos this week. They will have fun and you will feel like a “the best” mom 😉
You need:
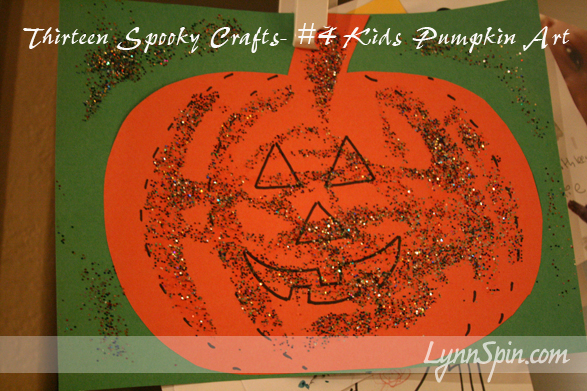
Glue stick, glitter, orange and green paper, a marker, and scissors
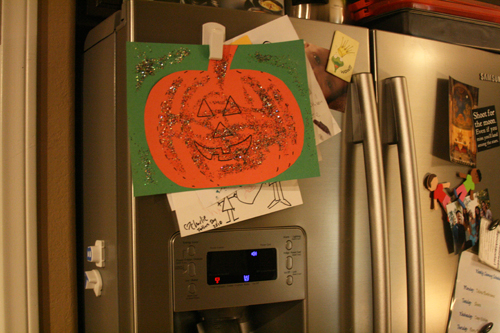
Cut out the pumpkin- if the kids are old enough draw the shape of a pumpkin and let them cut it out. Draw a face on it.
Glue the the pumpkin to the green paper. Let them use the glue stick to rub on the paper, then help them sprinkle the paper with glitter. Shake over a trash can to remove excess glitter. Add more glitter if you want.
My husbands super cool Aunt Kathy did this with my two year old while I went to the gym. (I am totally stealing her idea.) Thanks for entertaining my little lady! Charlie loved it. 
Stick it on the fridge!
Get Crafty with Your Kids!
Headband Holder
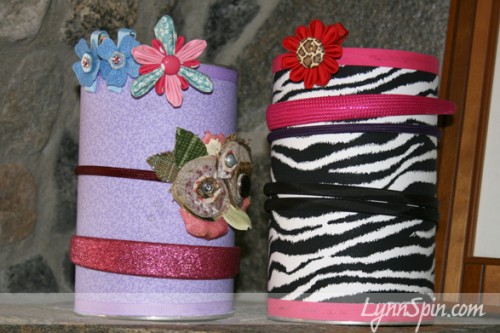
I told a friend forever ago that I would make her girls headband holders. So, I finally did. They took me like 20 minutes to make…I am kicking myself for not doing it sooner. Oh well. Here is the info on how to make this.
Sami- these are for you! I will send them out tomorrow!! Sorry for the wait 
Need:
Fabric
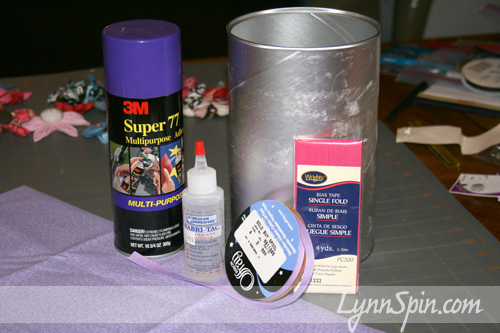
Multipurpose Spray Adhesive- I used 3m Super 77
Fabric Glue- I used fabri-tac
Ribbon
Baby Formula or Oatmeal Container
First- rip off the paper on your container. Cut a piece of fabric to fit the can. I used a Costco size formula can, so I cut my fabric about 7 3/4 inches wide.
I then took my can outside and sprayed it with the adhesive, came back it and slowly wrapped my fabric around the can. Smooth fabric as you go.
Cut left over fabric off and glue edge down with fabric glue. Then glue ribbon around bottom and top of can, right over the fabric. This covers the raw edge and helps to keep the fabric from fraying. I used fabric for this project, instead of mod-podge and paper because I thought it would last longer and not tear. The fabric also gives the headbands some grip so they don’t fall to the bottom of the can.
They are great to put headbands on and you can also store bows inside and around the rim. Awesome!
Get Crafty with your BAD Self!


