Large Fabric Wreath Bow
December 6, 2011 by Lynn
Filed under Christmas, Crafts, Featured Content, Holiday Crafts, Sewing
Fabric bow making 101. You can use this tutorial to make a fabric bow of any size. Just scale it up or down depending on your needs 
Here’s how I made this BIG fabric bow.
(if you hate to sew, don’t like to sew, or don’t own a machine, or have one you can borrow- bust out the hot glue gun. He is always helpful  )
)
I started by cutting a piece of red linen 16 inches wide by 35 inches long. I folded it in half long ways and sewed the ends together.
I then creased it so the seam was in the middle on top and ironed it flat.
I then folded the ends in to meet in the middle.
I sewed down the middle to hold the ends in place.
I took a piece of thick thread, wrapped it around the middle of my bow, pulled it tight, and tied a knot.
waalaa bow….but we are not done yet!
Straiten it out a little and make sure the sides are even.
Then I cut another piece of fabric 8 long by 6 wide. I did the same steps of folding in half, sewing together, then ironing with seam on top.
I hot glued that piece over the thread in the middle of the bow.
I then cut out 4 more pieces to be the ends of the bow that hang down.
I have the pattern I made for those; if anyone wants it e-mail me.
I sewed two together them flipped them right side out.
And I hot glued them on to the back of the bow.
Then I cut and sewed a piece for the wreath to hang from and hot glued the bow on to that.
Took about 30 mins. I’d say this is an easy project. AND I’d say “Go get crafty with your bad self! And pin me on Pinterest while your at it ;)” wink wink 
Here is the finished bow on the wreath I bought at Costco.
Friday Feature- Today’s Fabulous Finds- Snowmen
December 2, 2011 by Lynn
Filed under Christmas, Crafts, Featured Content, Holiday Crafts
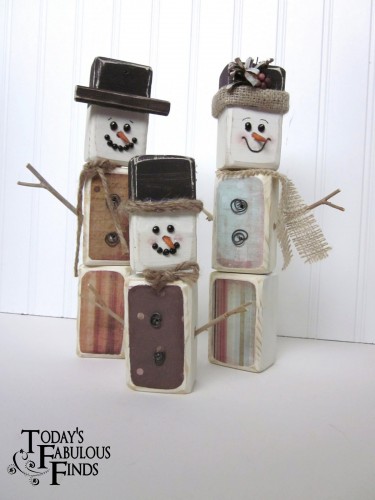
One of my close friends pinned these on Pintest and I saw them and knew I needed to make them! TOO CUTE!
What a great idea Janet over at Today’s Fabulous Finds Blog had.
Check out her fun blog and see how she made her snowmen by clicking HERE
And I had a ton of wood 2 x 4’s left over from building our dinning room table. Click HERE to see that. Anywho… My buddy came over after we had both put our kids to bed and we made these adorable snowmen. I made 4 because I knew Charlie would wonder where her or Beck was. So here are my four that I made.
We did ours just a little different. I didn’t have dowels, so we just used wood glue to stick them together. We used beads and puff paint for the faces. We hot glued the arms and decor on.
Thanks for the fun idea Janet! And thanks for helping people to get Crafty!
DIY Beachy Wood Starburst Mirror
November 30, 2011 by Lynn
Filed under Crafts, Decorating, Featured Content, Home and Garden
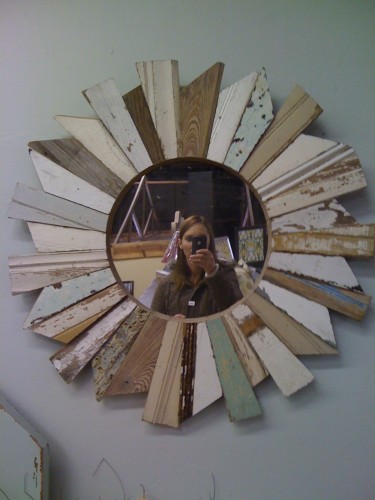
I saw this mirror in a store I love here in Utah, but it was $395.00. I just don’t have that kind of cash right now. I showed the picture to the hubs and he said that “You could totally make that.” “I”, “Me, Lynn” “BY MYSELF” could totally make it. Uhh… what?! He said he would give me tips, but I was pretty much on my own with this one. OK. Hear me ROAR ladies. That’s right, I used the saw, the man tools, and I got crafty with MY BAD SELF!
My sister in-law and I decided we would both make one of our selves. SO! Here is how we recreated this beauty.
We started by collecting wood that looked reclaimed, like the wood on the frame. We took some wood out of a friends yard, a few pieces off a really old looking pallet, and went to the Re-store to buy a few left over molding and other wood boards. I also bought a 4ft pieces of cedar from Home Depot. We started by cutting the wood boards between 6-9 inches long. We cut the tops at angles between 20 and 45 degrees. We then cut, using the chop saw, and angle from the top to the bottom of the wood.
We each laid out the pieces to see how we wanted it to be.
We first cut out all the pieces that would be “kissing”. There are six sets of the ones that face each other, “kiss”. And then just like a puzzle we pieced them together to be the overall size we each wanted.
After this we numbered them on the back side. Then transferred them into my laundry room for painting/distressing.
We used multiple painting techniques to give them each some character. We used 220 and 100 sandpaper to rough some of the paint up. We did a crackle finish on two, with silver underneath and blue on top. And I’ll talk about that more towards the end of the post. But, we had a fun time play with different techniques.
After it was dry I started to put it together by glue the sides of each piece together.
I clamped a few of them together to help make a stronger hold.
After it was all nice and glued. I added a few small pieces of thin wood to the back for added support.
Okay, maybe more than just a few….
This is going above my bed. I wanted to make it strong  I am sure there is a better way to do this, but this is the best thing I could think of.
I then placed some heavy books and stuff on top of it till it was dry.
When it was dry and nice and strong I flipped it over to add the mirror. I had a left over mirror from my gallery wall. I took one of them down from the wall. Cuz the one next to the M, it made it look like “MOO” and it was driving me nuts. 
So I had the mirror and it was wrapped in jute. Great for the look I was going for.
I would have glued or nailed the mirror on, but I decided instead to use some heavy duty Velcro. That might seem weird, but it works great. And if it breaks or I need to remove it for some reason, I can easily take it off.
I added some picture hanger hooks and wire to the back and I AM DONE!
I love the look  It totally goes with my “beachy barn look” I need to find a better name for that…. any suggestions?
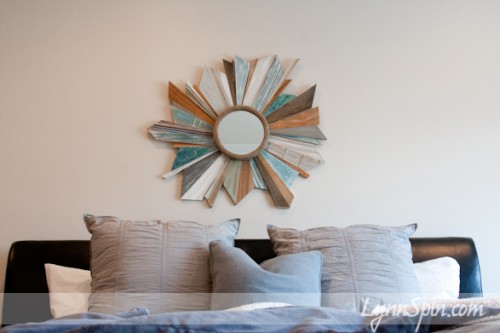
Here it is all done hanging above my bed!
It’s not a perfectly shaped as the one I saw in the store, but I like it this way.
Oh! And by the way. This starburst mirror did not cost me $395, it cost me about $10!!!
Here is the crackle I mentioned above. I wanted the metallics to be subtle.
Mostly we painted, sanded, painted more, sanded more.  It was all an experiment.
On both the white above I paint a few different colors, let it dry, then sanded with 220 sand paper. That was already white then I started. The blue one, I painted blue then sanded, then added a navy blue glaze, then sanded again. I white washed the thin one next to the blue one. A few I left natural. Mostly the cedar ones.
I just added the blue to this already white board then sanded with 220.
Some we dinged up with a hammer or nails.
We also added a little gold leaf to others. You can’t see it very well in the pictures.
This was a fun project. Now I need to work on that pillow situation 😉
Always a project at my house 
Always getting crafty with my bad self!
Ribbon Trees
November 28, 2011 by Lynn
Filed under Christmas, Crafts, Featured Content, Holiday Crafts
These tree are pretty easy they are just a little time consuming. This is a sit in-front of the TV and watch a good show kinda project. They make a great center piece at Christmas dinner. I would normal make these red and green, but I made them for my mom and these are her colors.
Buy 3 different sized foam cones
A few different sizes, colors, textures of ribbon. About 5 or 10 different ribbons.
A box of 3/4 of an inch to 1 inch needles.
Cut the ribbon into 3 inch pieces. Start at the bottom of the cone folding your ribbon in half and pinning it to the cone. Work your way up alternating the ribbons in a pattern.
Create a bow at the top by twisting and pinning one of the ribbons. Done!
$2 Standing Chalk Board
November 21, 2011 by Lynn
Filed under Christmas, Crafts, Decorating, Featured Content, Holiday Crafts, Home and Garden, Thanksgiving
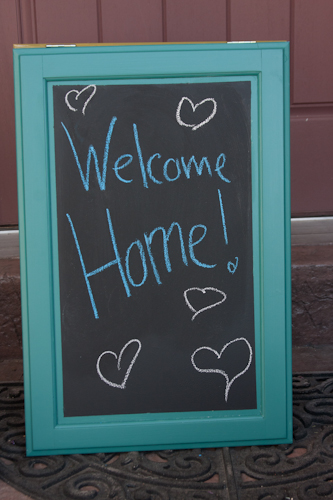
I have been wanting a chalk board for outside my house to write different fun things on. Like those chalk boards you see outside of restaurants with the daily specials. I looked them up online and they cost around $189 buck-a-roos! Crazy! I recently discovered a place called Re-Store in Orem, Ut. It is for Habitat for Humanity. You can drop off old cabinets, doors, paint, any building materials. They use some of it and the public can come in to buy it too. It’s like a thrift store for building materials. I love it.
I bought these two lovely old cabinet doors there.
I painted them two different colors, to get more use out of them.
I tapped of the inside and painted on some chalk board paint.
After that was dry, I turned them over and screwed in some regular door hinges to the tops.
I probably should have painted the backs too, but I am too lazy. 
These are the top of the cabinets now attached together. (turned sideways)
Done! Easy as pumpkin pie! Took me only a few hours, mostly waiting for paint to dry, but was fast and easy!
And, because I had the hinges and the paint it only cost me the $2 dollars for the doors. Sweet! I LOVE projects like these!
Now I can use it all the time 
Seashell Necklace in November
November 16, 2011 by Lynn
Filed under Crafts, Featured Content, Kids Crafts
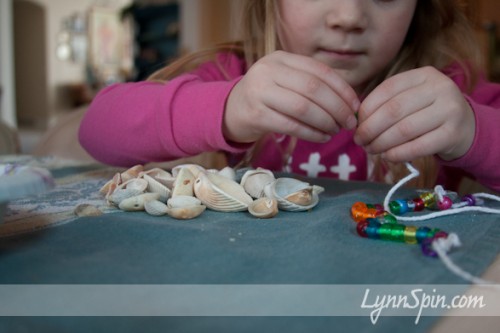
Okay, I know it doesn’t really fit to make shell necklaces in November. But, it is a good way to remember summer will come again and it’s kinda fun as the snow is falling outside 
This could be a fun Family Home Evening idea.
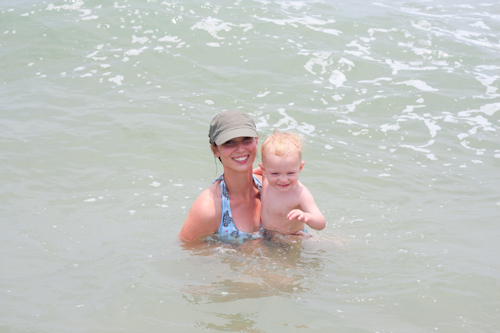
Look through your pictures or scrapbooks of summer with your kids. Talk about the things you liked about being at the beach, swimming, playing with them on vacation. Maybe have them write down or draw pictures of their favorite things to do in summer. Talk about the seasons that Heavenly Father created and why each one is essential. Then bust out all those shells you collected last summer, get some string, and go to town. You could even make hamburgers or Hawaiian haystacks for dinner- that’s summerie.  Or make a coconut cookie as dessert. An easy FHE with almost no prep and it’s hands on!
I wrap a little thing of tape on the end of the string for the little ones to help the slide the beads and shells on easier. Charlie and I like to practice counting while she strings her beads. 
Oh summer days, please come back soon  We miss you already
Kids Leaf Place-mats
November 7, 2011 by Lynn
Filed under Crafts, Featured Content, Holiday Crafts, Kids Crafts, Thanksgiving
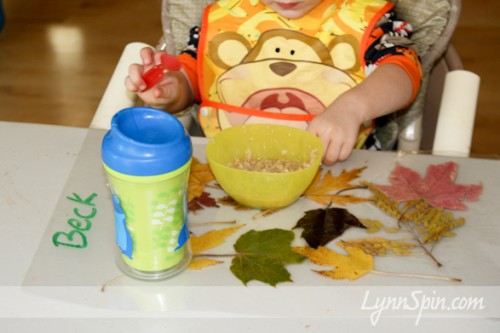
This is a great Family Home Evening idea you can do tonight with the kids! It requires little to no prep and is easy for all ages. And your kids can use these at the kid table during Thanksgiving 
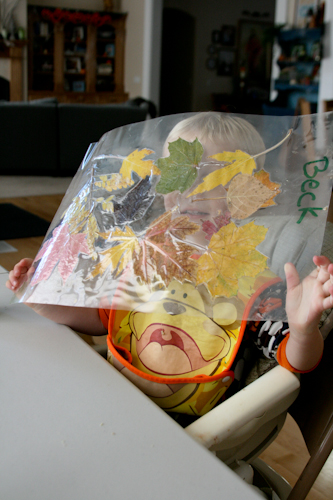
After dinner onE night we went for a walk around the block and collected leafs.
Then we went home and laid them out on our laminating sheets.
The kids loved watching it go through the laminator.
If you don’t have a laminator just glue your leafs to a piece of paper. Add some stickers and glitter too. You can then take it to any Kinko’s, map store, office supply store and they will laminate it for you for a small price.
They are so happy with their work!
Get crafty with your kids…they will love it 
20 Minute Pumpkin Bag- Easy Printable Pattern
October 31, 2011 by Lynn
Filed under Crafts, Featured Content, Halloween, Holiday Crafts
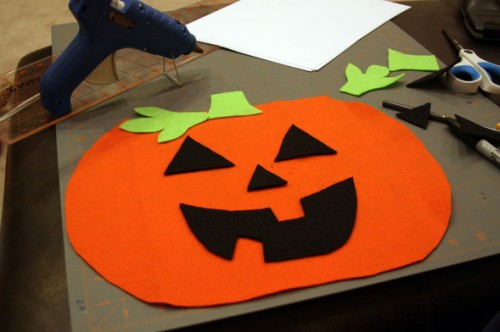
If you need a pumpkin bag for tonight, here is your last minute bag pattern and tutorial. It is soo easy! And, no sewing required. Just grab your scissors, hot glue gun, and felt. Print out my pattern and go to town. 
Happy Halloween!!
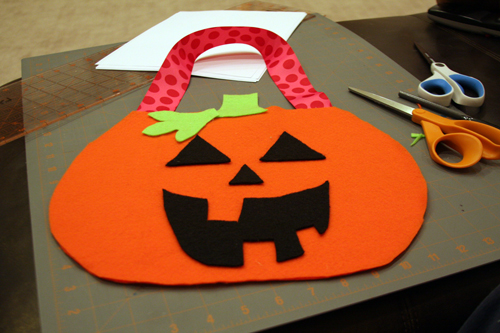
Follow the pattern and cut out all your pieces. Hot glue a 22 inch piece of ribbon on to the inside of your back piece and set it aside.
Glue the face onto the front of your front piece.
Then take the back pieces and put a thin line of hot glue all the way around the outside edge of the pumpkin DO NOT GLUE THE TOP EDGE! That is the opening. 
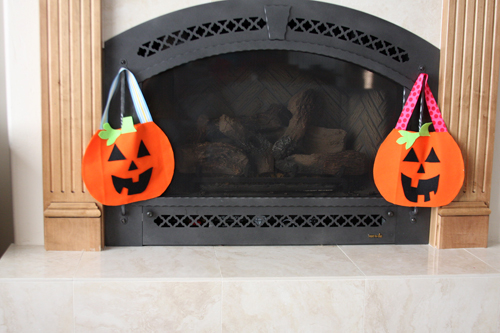
Lay the top piece on. Taa Daa! 20 minute (maybe less) pumpkin bag done!
If you wanted to make it a little fancier you could sew the pieces on then sew it together. It would look great with some fun stitching around the edges. Get Crafty!
My kids where super happy to find these this morning. I love Halloween 
Print the patterns – click HERE for bag and HERE for the face pieces.
Thrifty Pumpkin Find and Makeover
October 13, 2011 by Lynn
Filed under Crafts, Featured Content, Halloween, Holiday Crafts
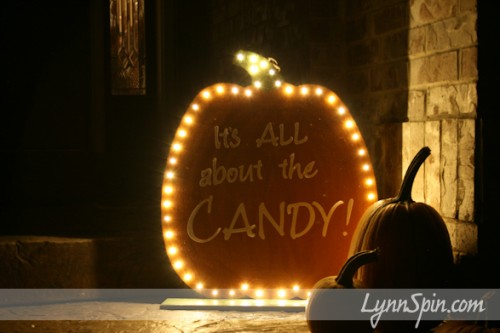
I found this pumpkin at Savers the other day. I was a little wobbly, but I figured I could fix that. Check out the makeover this plan pumpkin got.
Go see what your thrift store has. It’s like a treasure hunt!
I added a little paint and glitter to my 7 dollar, 2 foot tall pumpkin. It looked better already.
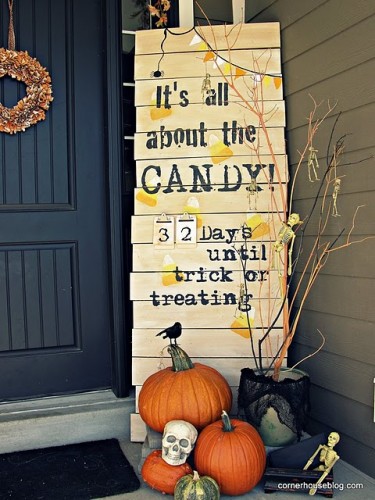
I had been want to make something like this, that I saw over at TheCornerHouseBlog.com
Very fun idea. I love this. I wanted to add a countdown and I loved the “It’s all about the CANDY!” I couldn’t fit it all on my pumpkin. So, I just went with the “candy phrase.”
Thanks for the inspiration Corner House Blog!
I cut some vinyl on my Cricut and this is what I made 
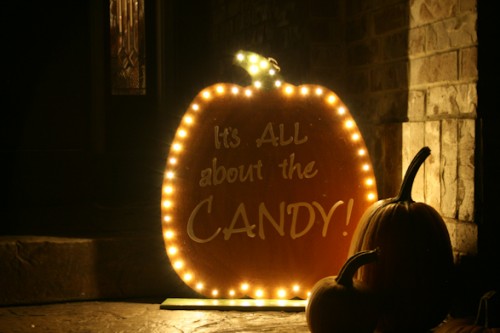
I thought about winding ribbon through all those holes. I decided my kids would love to see it lit-up at night and went with some Christmas lights instead. I am pretty sure that is why they are there anyway. 
TAA DAA!
I love Halloween!
I linked up here!

Batty Halloween Wreath
October 12, 2011 by Lynn
Filed under Crafts, Halloween, Holiday Crafts
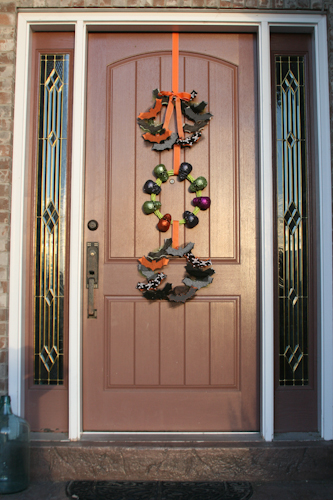
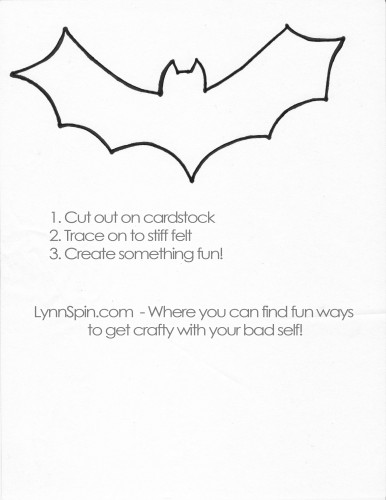
I am kinda obsessed at the moment with three tiered wreaths. This is my Halloween wreath. On this post (scroll down to find) is a printable of the pattern for the bat I used.
Hope you find a fun way to use it this October.
I bought three round wood wreaths from the dollar store and used spray paint I already had to make them green and black.
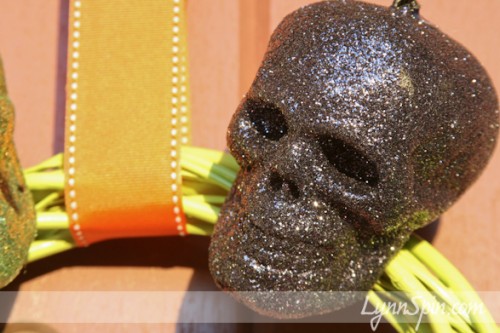
I had orange ribbon that I hot glued to hold the wreaths together. I found these skulls at my local thrift store and hot glued those on as well. Don’t you love hot glue?! I do.
I cut out the bats with stiff felt- can find at any craft store. I also cut out some black and white patterned fabric bats too and glued them onto some of the hard felt. This was the most time consuming part of the whole thing. I wrapped some glitter tulle around some of the bats too.
You can get the full sized bat pattern by clicking HERE .
I linked up to-


