Shared Boy/Girl Room
January 28, 2013 by Lynn
Filed under Crafts, Decorating, DIY, Featured Content, Furniture Redos, Home and Garden
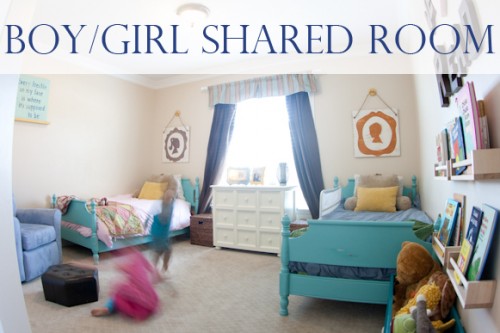
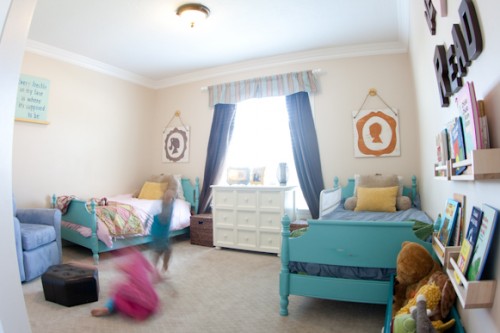
When sweet little number 3 came along, I wanted her to be in her own room. I wanted to put the kids who where on the same sleep scheduled in the same room. That way there would be less waking me up!  And I felt little Ruby Lou would be safer if she didn’t have a loving sibling trying to give her an extra blanket or stuffed animal. So, my only solution was to put the two oldest in the same room. How do I decorate a boy/girl room without it being too masculine or too famine?! I decided I would start with fabric and go from there. After a fabric hunt I found my base for the room colors. (Which are the drapes) My mom and dad sent down my old bed frames from Washington and I painted them a color from the drapes. And I went from there…
Here are some pictures. I will post more info on the art and other tidbits around the room later. I am doing the reveal first hahaha…. 
My friend (who has a super cute house and blog, click HERE for The Rooster and The Hen) gave me the idea to paint the beds this teal color, pulled from the drapery fabric.
To see how I painted the beds Click HERE
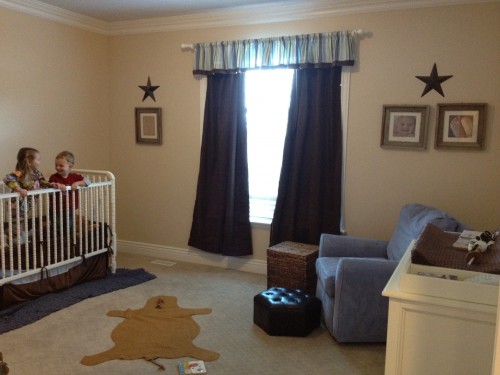
-The room looked like this before-
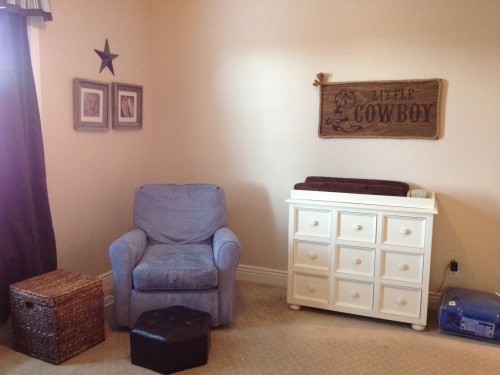
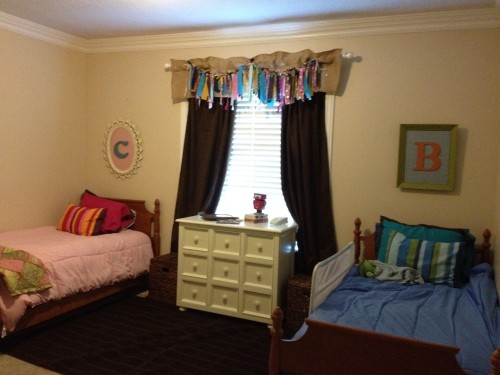
-At first I tried to go this route-
It just wasn’t working for me.
So I changed it up!
I took some pictures of my midgets to put up in their room. Bought the shelves from Ikea and painted them yellow. And made some art to put up. They helped me make the “Every freckle on my face is where it’s supposed to be.” quote art work. And they had a blast. I’ll post pictures of that later 
(Quote from and India Arie song. Love her songs!)
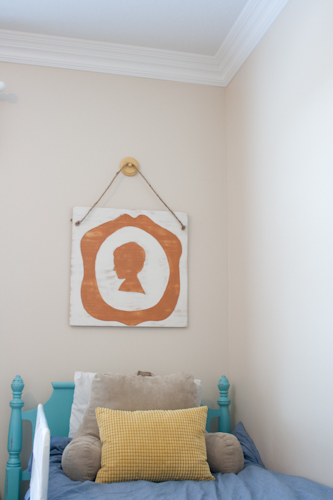
Now don’t worry, these are not really hanging from the rope. I have earthquake wall hooks on the back, these babes are not going any where! Safety first!!
I made these out silhouettes of plywood and paint that I had in the garage. I watered down my paint and sanded after I painted to give these a distressed look. I added the rope and make the “faux” mustard yellow wall hooks. Pretty dang cute I think!
I put up these picture boards, I had them laying around the house. I want to have lots of pictures around my house
and I knew my kids would think this was super cool. It is up pretty high so they can’t reach the tacks. 
I have been seeing all those cute “Read” signs on Pinterest and wanted to do one similar.
But, I didn’t want it to seem like I was demanding someone to read, lol, so I added the “we love 2” part.
The heart is from the top of a cardboard box near the letters at Hobby Lobby.
By the way! I do not recommend these Ikea spice racks for book shelves. The books fall off all the time.
The “animal cage” as we like to call it was built by little ol’ me! 
I didn’t know what to do with all the stuffed animals my kids have. I had them pick out some to donate, I was sneaky and got rid of a few, but they still had so many.
So I thought up the idea for this bin. I measured they space under the books and made this one morning while my kids where at school. I will share that tutorial soon too.
I love it! And it cost me about $8 or less.
I thought a lot about bedding for this room. That was probably the hardest part. I looked everywhere! I bought a few different things, tried them and sent them back. I ended up going with these from the Land of Nod. They were both on sale for about $25 bucks each. It was my husbands idea to do a blue and a pink. I love how it all came together.
Building an Ottoman
May 8, 2012 by Lynn
Filed under Crafts, Decorating, DIY, Featured Content, Home and Garden
I keep seeing all these cute ottomans in adorable fabrics and I WANT THEM! So, I decided, “Hey! I can do that! I am soo crafty with my bad self, how hard can it be?!” Well my fine friends. It is NOT THAT HARD! YOOOU CAAN DOOO IT TOO!
Here’s how I made this fun little one for my front entry way. I am planning on a much larger one for my living room in the near future. So stay tuned for that bad boy. I already bought the fabric and am super excited.
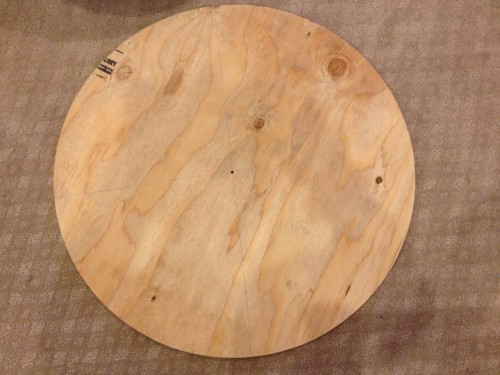
I bought this round wood piece of wood at Lowes for about $7. Home Depots are different, not as good for this type of project and are MUCH more expensive (FYI).
I measured to the center and drilled a whole first, because I knew I wanted to add a big button in the middle later on.
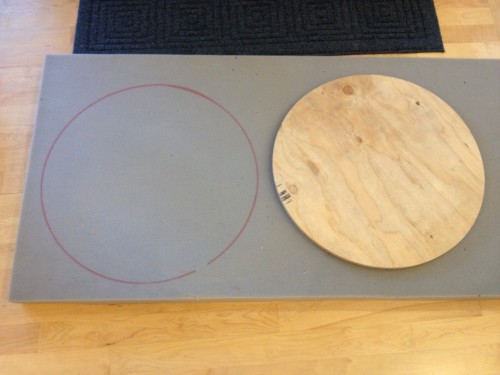
I bought this foam from Home Depot, they have it at random times through the year. It is $20 for a huge piece. You could make a few ottomans with the size it is. It is 3inches. This stuff is much more pricey at JoAnn’s or any other craft store, so this is a good deal. Great for seat cushions on a bench or something too.
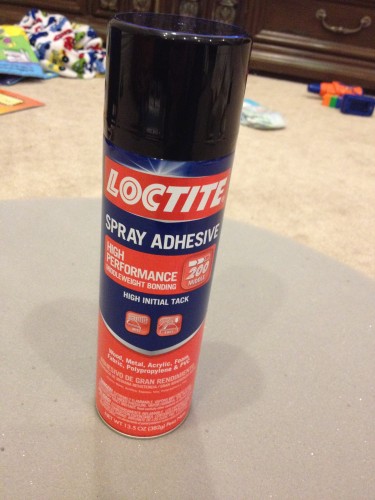
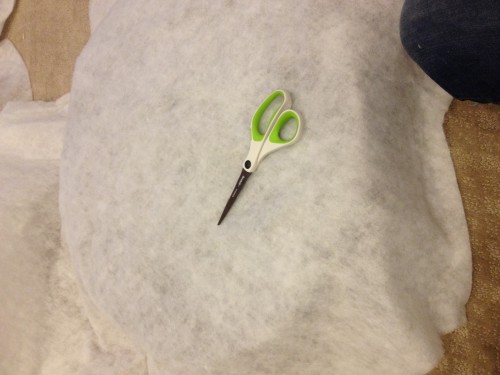
I traced a circle and cut out the foam with my ceramic knife. Any smooth super sharp knife or razor blade will work. Then I used a permanent spray adhesive to attach my foam to my board. I also cut two different layers of quilt batting and sprayed that on too.
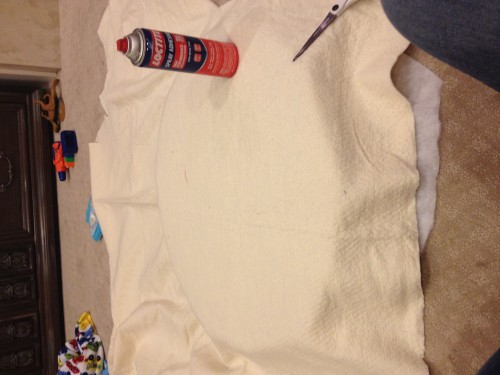
I glue it all down and then cut my fabric circle.
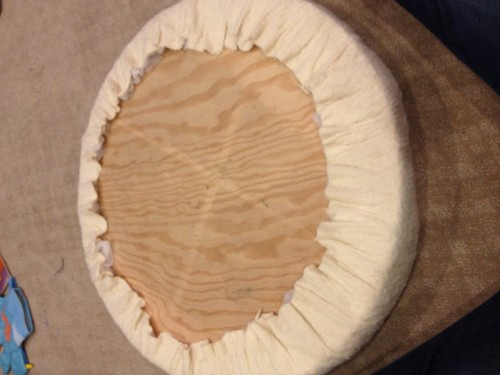
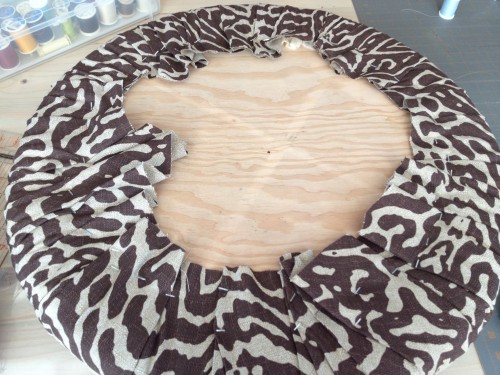
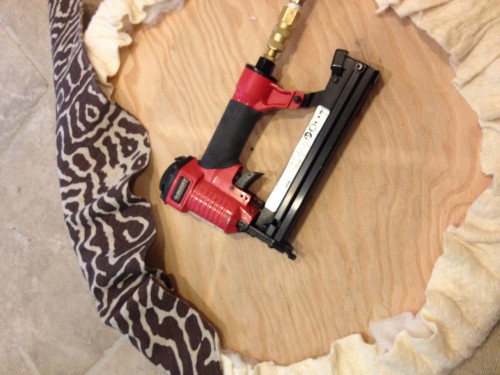
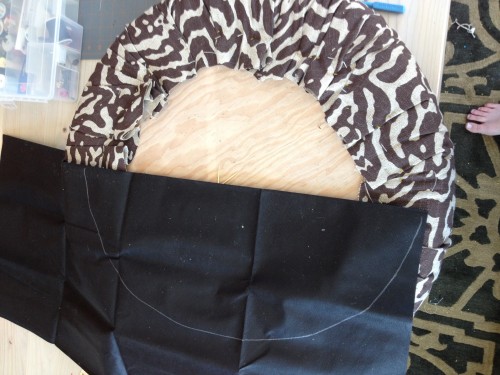
I did not glue the top fabric. I used my staple gun, pulling my fabric tight! and stapling it all the way around. I tried to make sure that the pleats of my fabric where only on the bottom and wouldn’t show around the sides. This would be much easier if it was square, but it worked out.
I have an electric staple gun and one that uses an air compressor, I used both. But the electric one would have been fine.
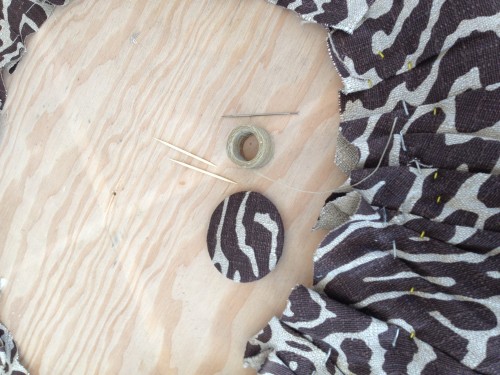
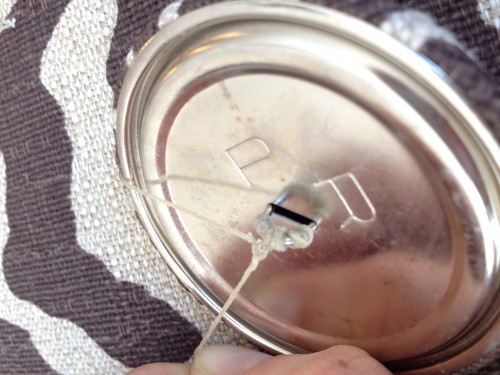
After that I put my button on, this was tricky because I didn’t have a very long needle. You will need a really long needle! You can read here to see more about putting buttons on furniture. CLICK HERE TO GO TO BUTTON TUTORIAL
After my button was on nice and tight, I cut and glued a cover over all my staples and ugliness underneath. You can buy this black chair under cover stuff from JoAnn’s or any craft store. I can’t remember what it is called at the moment, but it will be in the upholstery section.
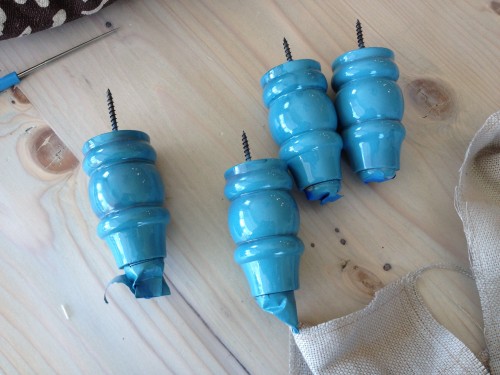
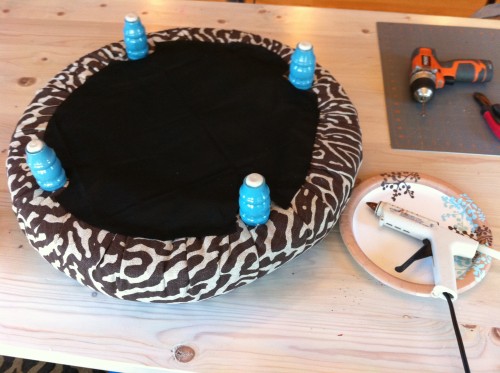
I then drilled holes for my freshly painted high gloss blue legs. So cute! And screwed them in to the bottom.
I hot glued down the cover fabric and waalaa! Done!
This would be rad with a cowhide too. Oh the possibilities!
GO ON NOW!
AND!!!
Gray and Yellow FREE Prints
March 20, 2012 by Lynn
Filed under Decorating, Featured Content, Home and Garden, Typography
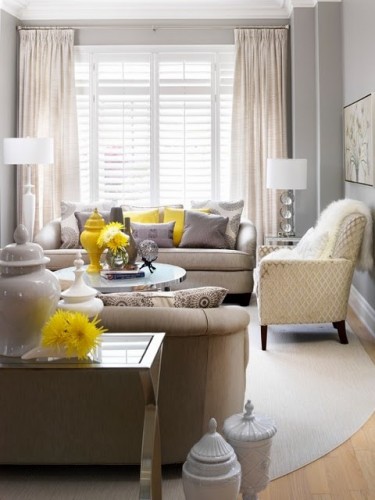
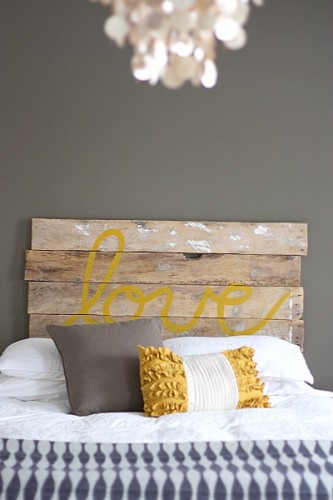
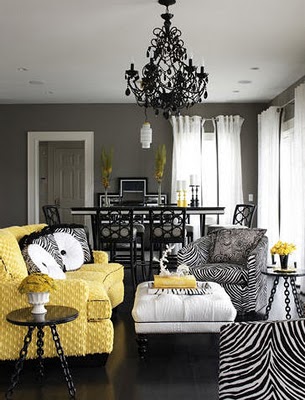
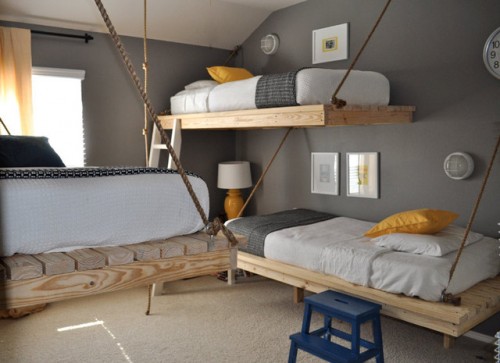
Gray and Yellow are super popular lately. They are everywhere from baby rooms, living rooms, teen rooms, and weddings.
Everybody is loving the yellow and gray!
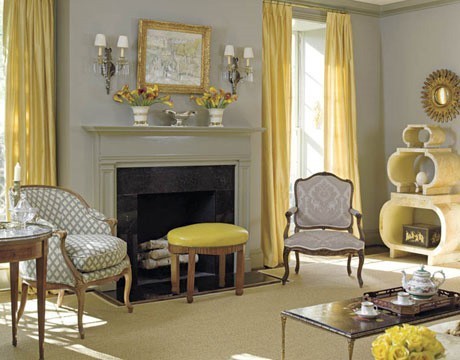
As seen in these beautiful room pictures I found on Pinterest …. of course. 😉
Picture from Google images.
Picture from My Revelment
From Tis So Sweet Blog
From Desire to Inspire
From Apartment Therapy
Two of my good friends are redoing rooms in their homes with this gray and yellow theme. I always LOVE to help a friend decorate and asked if I could create some prints for them.
One friend is redoing her daughters room who is a teenager. These are prints she wanted and a few variations for you to choose from too.
PLEASE NOTE: The links to print these will take you to BOX.NET where you can download each image to your computer then print on your own. I recommend printing at Costco, cuz it’s easy. But please make sure you upload in “full resolution” and click “DO NOT AUTO CORRECT”
These are all 8×10’s
Have fun!
My other friend asked if I would make some airplane prints for her soon-to-be little boys nursery. Since I can’t be at her shower I was more than happy to do it. 
These are all 10×8’s
Note! I am not sure why the colors are showing up different on this one. It should print fine.
Have fun decorating!
Making a Table- The Process
December 15, 2011 by Lynn
Filed under Decorating, DIY, Featured Content, Home and Garden
I really really wanted a new dinning room table when we moved. But, a few things kept taking priority over buying a new table. Espeacially since the tables I liked where around 1500 to 3000 bucks. hmmm…. Dev (the hubs) wasn’t really feeling that. So for my b-day he told me he would make one before Thanksgiving.
Uh… he has never made a table before! What to do… Thinking thinking. I started to cut out pictures and read blogs about what I wanted. Then like a present the Lowes project magazine came in the mail with instructions on how to build a table. It didn’t look to hard.
We went and bought all the wood a week later.
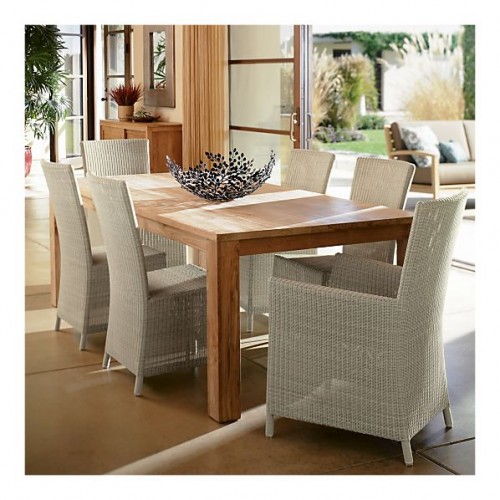
This table from Crate and Barrel is one I have had my eye on for years. We modeled our table after it.
I told Dev that if we were going to build our own table I wanted to do it for under $100. And! I wanted it to fit 10 people. He liked my challenge.
We bought pine 2×6 x8 boards for the top
2×4 for the ends of the top and the frame
4×4’s for the legs
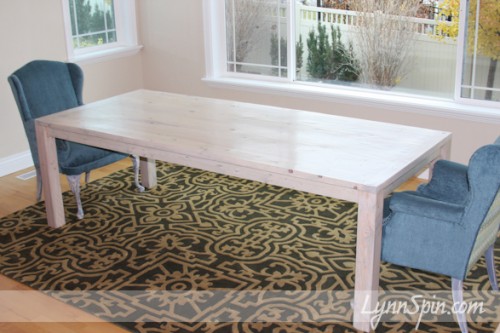
We did a few things differently than the Lowe’s directions. But, it helped to have an idea of how to start. Mostly we used the directions for the frame (which I’ll share below). We wanted the table top to be seamless. So instead of the Lowe’s way, we changed it up a bit. We started by trimming up the sides of the 2×6’s to make them flat. 2×6’s from the store are slightly curved.
After cutting those we used a biscuit joiner to cut into the sides of the wood. We put biscuits and wood glue between the boards and clamped them together, adding one board at a time. The table was large so we used pipe clamps to hold it all together.
We planed the ends then put the end board on using a router to cut a tongue and groove joint. Then glued it and clamped it again with the pipe clamps.
We then used our hand planer to smooth/even out the top. After that was done we used 100 grit sand paper on the electric sander to smooth it out more. Ideally you would want to use a planer and run each board through it before starting to put the top together. OR! You could put the top all together and find a cabinet maker who would let you run the entire piece through one of their large industrial planers.
While the glue was hardening we picked out stains. I wanted a beachy farm house table feel. So we decided to do a gray stain with a white wash over the top.
Here is a link to the Lowe’s table directions that we used for the frame. Click HERE
We flipped the top upside down and started building the frame right on to it.
We used a pocket hole jig to join the top to the frame.
We changed the placement of the legs and moved ours to the edge of the table top, and secured them with lag screws. We inset only the apron piece.
Then we flipped it back over and filled some of the knots and holes with stainable wood filler.
You should probably use gloves here….oops
After that was dry we sanded the entire piece with 220 grit sand paper.
Before staining the table, we prepped it with Minwax Pre-Stain Wood Conditioner. This helps a lot!! It helps you get an even stain, avoiding ugly blotches.
I then stained it with a weathered oak stain.
After that was dry I went over it with a white wash.
To finish the table we applied 4 coats of a water based polyurethane.
We built a solid table for under $100 dollars in less than a week. AND! It seats 10 people.
We already have plans to build another one! Ha, I know, we are crazy. But, we had a ton of fun doing this project together. I love my man.
This table might be for sale soon, if you want it let me know 
The next table will have turned legs, with a darker stained top and painted legs. I am excited to do it again  Stay tuned for that one sometime in January 2012!
Please leave me some comment love! 
DIY Beachy Wood Starburst Mirror
November 30, 2011 by Lynn
Filed under Crafts, Decorating, Featured Content, Home and Garden
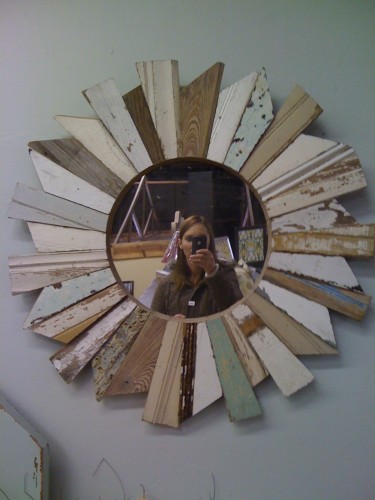
I saw this mirror in a store I love here in Utah, but it was $395.00. I just don’t have that kind of cash right now. I showed the picture to the hubs and he said that “You could totally make that.” “I”, “Me, Lynn” “BY MYSELF” could totally make it. Uhh… what?! He said he would give me tips, but I was pretty much on my own with this one. OK. Hear me ROAR ladies. That’s right, I used the saw, the man tools, and I got crafty with MY BAD SELF!
My sister in-law and I decided we would both make one of our selves. SO! Here is how we recreated this beauty.
We started by collecting wood that looked reclaimed, like the wood on the frame. We took some wood out of a friends yard, a few pieces off a really old looking pallet, and went to the Re-store to buy a few left over molding and other wood boards. I also bought a 4ft pieces of cedar from Home Depot. We started by cutting the wood boards between 6-9 inches long. We cut the tops at angles between 20 and 45 degrees. We then cut, using the chop saw, and angle from the top to the bottom of the wood.
We each laid out the pieces to see how we wanted it to be.
We first cut out all the pieces that would be “kissing”. There are six sets of the ones that face each other, “kiss”. And then just like a puzzle we pieced them together to be the overall size we each wanted.
After this we numbered them on the back side. Then transferred them into my laundry room for painting/distressing.
We used multiple painting techniques to give them each some character. We used 220 and 100 sandpaper to rough some of the paint up. We did a crackle finish on two, with silver underneath and blue on top. And I’ll talk about that more towards the end of the post. But, we had a fun time play with different techniques.
After it was dry I started to put it together by glue the sides of each piece together.
I clamped a few of them together to help make a stronger hold.
After it was all nice and glued. I added a few small pieces of thin wood to the back for added support.
Okay, maybe more than just a few….
This is going above my bed. I wanted to make it strong  I am sure there is a better way to do this, but this is the best thing I could think of.
I then placed some heavy books and stuff on top of it till it was dry.
When it was dry and nice and strong I flipped it over to add the mirror. I had a left over mirror from my gallery wall. I took one of them down from the wall. Cuz the one next to the M, it made it look like “MOO” and it was driving me nuts. 
So I had the mirror and it was wrapped in jute. Great for the look I was going for.
I would have glued or nailed the mirror on, but I decided instead to use some heavy duty Velcro. That might seem weird, but it works great. And if it breaks or I need to remove it for some reason, I can easily take it off.
I added some picture hanger hooks and wire to the back and I AM DONE!
I love the look  It totally goes with my “beachy barn look” I need to find a better name for that…. any suggestions?
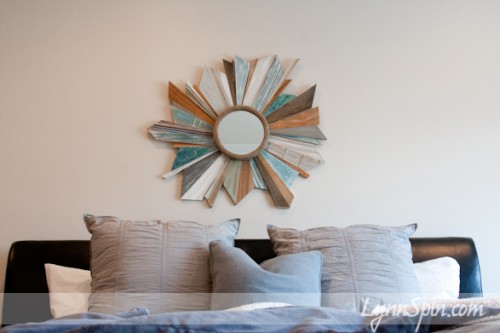
Here it is all done hanging above my bed!
It’s not a perfectly shaped as the one I saw in the store, but I like it this way.
Oh! And by the way. This starburst mirror did not cost me $395, it cost me about $10!!!
Here is the crackle I mentioned above. I wanted the metallics to be subtle.
Mostly we painted, sanded, painted more, sanded more.  It was all an experiment.
On both the white above I paint a few different colors, let it dry, then sanded with 220 sand paper. That was already white then I started. The blue one, I painted blue then sanded, then added a navy blue glaze, then sanded again. I white washed the thin one next to the blue one. A few I left natural. Mostly the cedar ones.
I just added the blue to this already white board then sanded with 220.
Some we dinged up with a hammer or nails.
We also added a little gold leaf to others. You can’t see it very well in the pictures.
This was a fun project. Now I need to work on that pillow situation 😉
Always a project at my house 
Always getting crafty with my bad self!
Our Kitchen Table
November 30, 2011 by Lynn
Filed under Decorating, Featured Content, Home and Garden
TTTAAAAAA DDDDAAAA!!!
Here is two pictures of the table Devan made for me last week! It is a beautiful solid table. And when I say “solid” I mean sturdy, that bad boy could be danced on!  I love it. I mostly love the way it was built. I am not sure if I love how we stained it. I might be sanding it down and starting over. The white wash didn’t turn out how I hoped. We will see about all that soon.
But! I can’t believe how quickly and well Devan made it. I will be giving a tutorial and directions on the process next week. But, for now here are two pictures to share.
P.S. You could totally do this! Just get a little DIY with your bad self and the hubs too. 😉
$2 Standing Chalk Board
November 21, 2011 by Lynn
Filed under Christmas, Crafts, Decorating, Featured Content, Holiday Crafts, Home and Garden, Thanksgiving
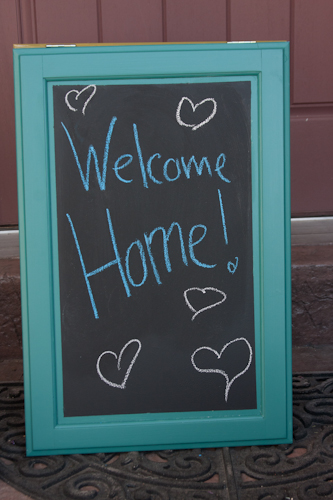
I have been wanting a chalk board for outside my house to write different fun things on. Like those chalk boards you see outside of restaurants with the daily specials. I looked them up online and they cost around $189 buck-a-roos! Crazy! I recently discovered a place called Re-Store in Orem, Ut. It is for Habitat for Humanity. You can drop off old cabinets, doors, paint, any building materials. They use some of it and the public can come in to buy it too. It’s like a thrift store for building materials. I love it.
I bought these two lovely old cabinet doors there.
I painted them two different colors, to get more use out of them.
I tapped of the inside and painted on some chalk board paint.
After that was dry, I turned them over and screwed in some regular door hinges to the tops.
I probably should have painted the backs too, but I am too lazy. 
These are the top of the cabinets now attached together. (turned sideways)
Done! Easy as pumpkin pie! Took me only a few hours, mostly waiting for paint to dry, but was fast and easy!
And, because I had the hinges and the paint it only cost me the $2 dollars for the doors. Sweet! I LOVE projects like these!
Now I can use it all the time 
Spray Painting Sticks
October 25, 2011 by Lynn
Filed under Decorating, Halloween, Holiday Crafts, Home and Garden
This time of year a lot of people are trimming up their trees and have a bunch of twigs and sticks leftover. Well, I was lucky enough to find a friend that had a huge pile!  And she was kind enough to share with me. I grabbed some tall and short ones for two different projects I had in mind.
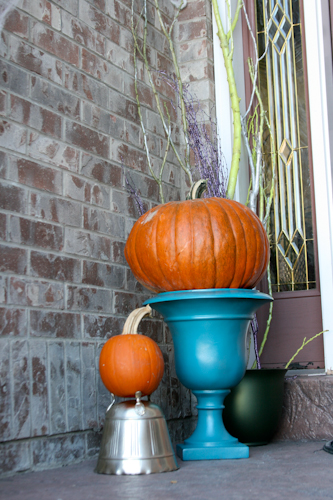
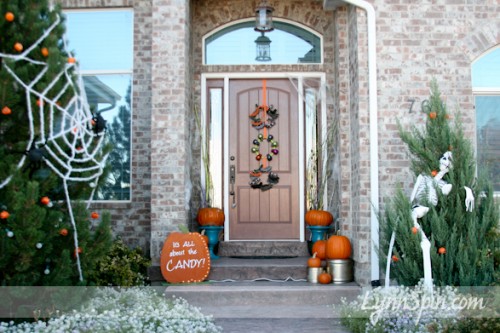
The first one was for my front porch. I took all the longs ones and sprayed them two different shades of green and of them some silver. The short ones are for my fire place mantel. I sprayed those black and then added a bit of shimmer with my metallic spray paint.
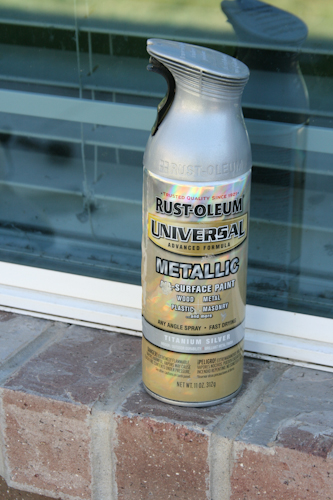
FYI- The two metallic spray paints in these pictures do very different things! The one in the top picture will give you a super shinny silver and the bottom on will be more of a light shimmer. You will see color through the bottom one, you will not with the one in the top picture.
I laid out the sticks in my yard and sprayed them all. I used the colors that I did, because that is what I had. I wanted black and green. My favorite brand of all of these is Rust-o-leum. I don’t say that because they pay me to hahaha, I wish 😉 I say this because you don’t have to really follow all the “spray paint rules” You can get close to your project without getting ugly drips, you can do a second coat after about 10-20 mins without something bad happening, you can spray it almost upside down and still get an even spray. And, it is cheap! It’s like $3.99 a can at Home Depot. So for me…Rust-o-leum wins 
I found some sparkly purple ones at Ross for 8 bucks and added them to the bunch.
I was struggling getting a good picture of them on the porch. Here is the end result, it looks even better in person. 
And here is sneak peak of the sticks I did for the mantel. More of that coming tomorrow.
Making Home – Stylish and Fun = Me
October 19, 2011 by Lynn
Filed under Decorating, Featured Content, Home and Garden
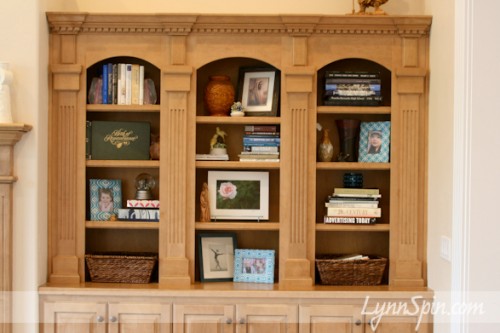
I was struggling with the big bookcase since I moved into this house 6 months ago. It is hard to make a rental house feel like YOUR home. Here is me attempting to make this space feel like it’s mine…for now. 
I had a nice bookcase I displayed stuff on in my old house, now I needed to recreate something new with my stuff in a new place. My bookcase in SD had three less compartments and was a bit smaller. Also since there wasn’t much on this, it seemed to be becoming the “junk spot.” The place where all the crap got left during the day.
So…my solution! Stacking some fun books in a cool way, displaying photos I love of my children in fun colorful frames, putting out some of my favorite things -little frogs I collect, snow-globe of Seattle, photo I took from my first photography class, and a few other fun things that make me happy to look at. Cuz that is what it is about people! Things YOU like.  I added the warrior man on top, because my hubs needs a few things he likes here and there too.
I also added two baskets- one for remotes and the other for library books. We needed a spot for both, since they both seem to get lost so easily. 
I think the blue fabric frames pop and I like that they are different but have a common theme and size.
I love that the things on the have special memories for me. The vase in the top middle we got on our honey-moon. The picture of Christ was a wedding gift. The birds on the second self down were a wedding gift to my parents. The Joseph and Mary carving on the third self down was from my trip to Israel. The flower picture was from my first photography class. These things make me smile. And you want to smile as you walk through your house. Make the space yours.
The vases are both from my dad. The tall one he bought for me and the shorter one he made when he was in college. My mom gave me that butterfly and I collect frogs. And of course Beck. 
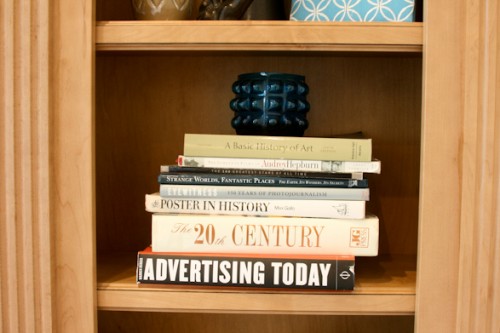 Books I love. Basic Art History, The 20th Century, Posters in History, Audrey Hepburn biography, Strange Worlds- Fantastic Places, Eyewitness- 150 years of photojournalism. Good stuff.
  In a few of the other compartments we have religious books, year books (I loved looking at my parents year books, I want my kids to be able to look at mine too), books I am currently reading, a few photo albums, and Devan’s families Book of Remembrance.
This bookshelf is a main focal point in my house so I am making it stylish and fun and reflect things I love. 
Now to spookify it 
And the rest of my house 
Find he eek block tutorial HERE
Make the Franky block HERE
Gallery Wall Welcoming You In
October 10, 2011 by Lynn
Filed under Decorating, Featured Content, Home and Garden
Come on in ya’ll! Okay, I am no where near a southern bell, but seriously come on in and check out my new and improved gallery wall.
Since I moved to the nice state of Utah I have had to find new ways to display my photos. I had a place for everything and everything in it’s place in San Diego. I felt a little lost starting over. But! I am glad to say I am pulling it together.
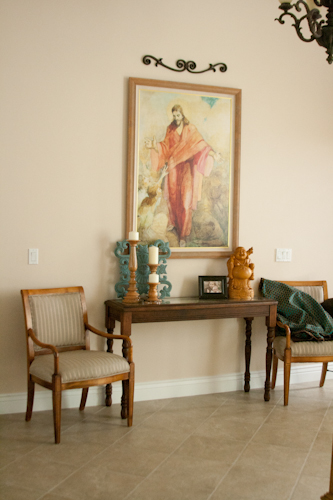
First things first- the entry way. I want people to feel welcome in my home. And I want to also display what I love and what is important to me. I am always telling my husband (as I beg for more furniture usually) that I want my house to reflect ME. I want you to walk in my house and say, “Yeah, that’s Lynn alright.” LOL it might be corny, but it’s what I want. 
Here is where I started 6 months ago when I moved in.
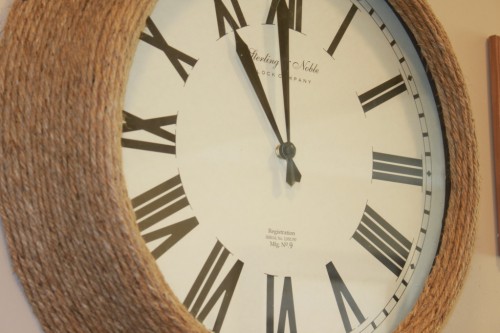
Since this picture I have redone those chairs and I had added a ton of pictures. The wall felt heavy will all the pictures. I wanted to add a letter M for our last name, but I wasen’t sure how to rearrange everything. I was a little nervous to play around. But! Fear Not! I got some inspiration over at my new buddies BRAND-SPANKIN NEW blog The Rooster and The Hen. She has a beautiful display wall with a jute clock in the middle. Check out their blog, it’s filled with great home decorating ideas.
I decided jute was the answer. I also had “The Hen” come over and she suggested adding mirrors. Great idea, I was off to search for jute, a letter, and mirrors.
Well I could not find a letter I liked anywhere. I made my own out of a piece of card board then wrapped it in jute. Probably cost me about 50 cents with the jute, hot glue, and free card board.
I used a ruler and a piece of mail with the letter M I liked, to reference while I drew it out. I cut it out, then started wrapping the jute around it.
My search for the mirrors was rough too. After trying Ross, Pier One, Hobby Lobby, ect. I came up with nothing. Savers. Yup, I love me a thrift store. I walked in and the first thing I saw was these three mirrors. Sweet-mother-of-pearl! So I wrapped those bad boys in jute too.
Here is how it all looks
Jesus AND Buddha welcoming all 😉
I love this sign that says, “This is our happily ever after.” Says it all 
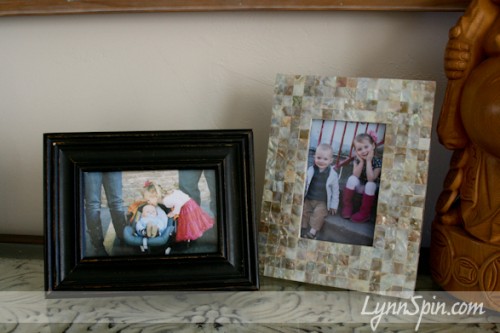
My favorite two people are front and center. 


