4 Ingredient Sweet Teriyaki Chicken Thighs
April 27, 2012 by Lynn
Filed under Featured Content, What's for Dinner?, Yummy Food
When I came home from the hospital after having my first baby a friend from church brought me this meal. IT WAS PERFECT! My baby was colicky and I had to be super careful what I ate. This was easy on me and the babe AND it tasted soo good! I know it wasn’t just the fact that all I had eaten for days was hospital food, this was really good. My husband made sure I got the recipe and we have been making it over the past four years. 
I still am not sure my friend has a name for this, so I just made up a name for it 😉 and will call it Sweet Teriyaki Chicken Thighs.
It is super easy too! This is a great meal for when you don’t have much time. Throw some rice in the rice cooker, broccoli in the streamer, and this in the oven. Waalaa, great meal everyone will love dinner.
All you need to do-
Preheat oven to 350 degrees
Put 1/2 cup sugar, 1/2 LOW sodium soy sauce, 1 cup of water, and 5-6 chicken thighs in a 9×13 baking dish. Bake for 30 mins or until chicken has an internal temp of 165. Flip chicken half way through…if you remember 
After the chicken is cooked, take out of dish and pour liquids into a pot on the stove top. Mix in a thickener, either 1 tablespoon of flour mixed into 1/4 cup of cold water OR 1 tablespoon of cornstarch with 1 tablespoon of cold water. Make sure it is mixed all the way before pouring it into the pot with the teriyaki liquids. With your stove on medium stir the flour or cornstarch mixture in until the liquids thicken up. Should take only a few mins.
Put chicken over rice and pour liquid over top. Done! EAT! 
AND EAT GOOD FOOD
Foaming Hand Soap
April 5, 2012 by Lynn
Filed under Cleaning, Featured Content, Home and Garden
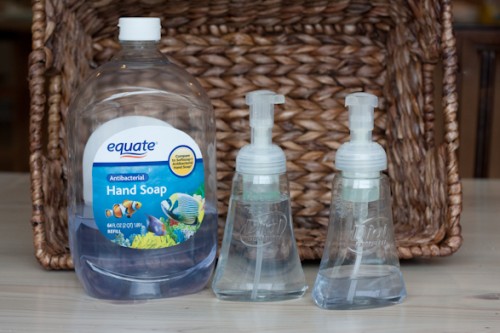
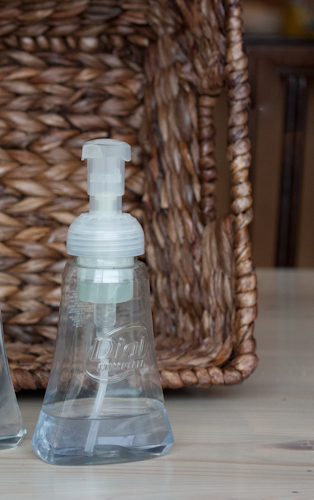
I used to buy the foam hand soap from Bath and Body Works till I vowed to try to be better at budgeting my moolaa. Now this is what I do. I bought a few of these Dial hand soaps from Walmart and I refill them about every 2 weeks. We seem to go through a lot of hand soap now that I have two little people running a muck.
We just use the bulk bottle of hand soap whether is from Costco or Walmart- where ever the best deal is or I am 
You can use any brand of bottled of hand soap as long as it has the foaming dispenser top.
We fill the bottle about a 1/4 to 1/3 full of the soap, then add hot water to the rest of the bottle. It needs to be hot to mix with the soap. Sometimes we add a dot of food coloring for the kids bathroom and let them choose the color.
So easy! So much less money running out my door…or down my sink. 
My Eastery Front Door Decor
April 5, 2012 by Lynn
Filed under Crafts, Easter, Featured Content
Easter!!! Deviled eggs, cute little chicks, chocolate covered children…such a fun day. I always love Easter and I love to decorate for it. I’ve definitely been in a slump decorating my house, but I did get around to doing the front door. Here it is!
I found some folding closet doors at the restore for $5 took them apart and painted them green. I made the bows using this pattern, click HERE. I just hot glued those, no sewing this time. I found the cardboard flowers at the dollar store along with the eggs on the topiaries and the fake flowers. I got the pots off KSL for $15 dollars and spray painted them. And the wreath I made a few years ago. You can find that tutorial and bunny pattern HERE
I didn’t want to spend a lot of money on making the topiaries and was having a hard time finding a cone shaped anything. So! I bought two pieces of poster board, rolled them up and glued them into a cone. I then went to town hot gluing on fake eggs and flowers. I think they turned out pretty great!
Burlap Easter Wreath
April 5, 2012 by Lynn
Filed under Easter, Featured Content, Holiday Crafts
This burlap wreath is a great way to decorate your front door for Easter.
You will need:
for wreath-
1 1/2 yards of burlap
14″ styrofoam wreath form
rotary cutter/scissors
spray bottle for wetting burlap, to help with mess
for bunny-
felt
hot glue
buttons, ribbon, flowers (whatever you like) to decorate bunny
I found this wreath on Craftaholics Anonymous (scroll to bottom of page).
I thought if I added a cute bunny it would be a great Easter wreath. It was very easy to make, it didn’t take much time at all. I started by cutting a 3″ wide piece of fabric and wrapping it around my wreath form to cover the green. I think on Craftaholic’s they painted their styrofoam, but I wanted a little more uniform coverage.
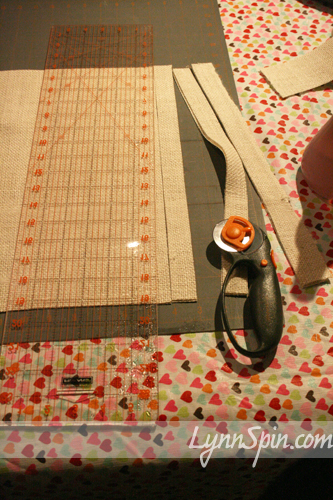
Then I started to cut the 1″ by 16″ strips of burlap.
Then I tied them around the form using double knots. I tried to get the pieces as close together as I could.
After I had the whole thing tied, I started on my bunny. I cut the shape out of felt, wrapped a tulle bow around its neck, added some flowers and WaaLa!
Click here for free bunny shape/pattern. Right click link and choose “file/link/target as” then open and print. Or if you click on the link, go to “save image as”
I added a little bit of super stiff felt on the back of the bunny, then hot glued it to the wreath. I glued a 9″ piece of ribbon to the back of the wreath and hung that bad boy on my door! Bam!
Get Crafty With Your Bad Self On The Holidays! Watch Out Now!


