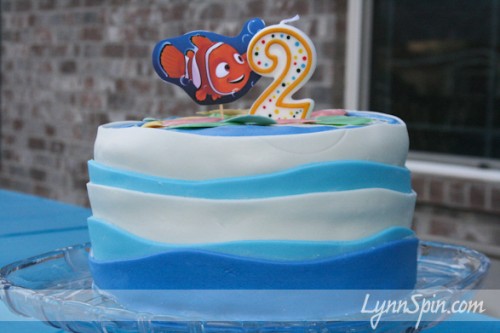
Marshmallow Fondant and Nemo Wave Cake
October 17, 2011 by Lynn
Filed under Birthday Parties, Cake, Featured Content, Holiday Crafts, Yummy Food
Marshmallow fondant is pretty stink’n easy to make. My sister in law makes some awesome cakes with marshmallow fondant. Over the phone, a few states away, she helped me make a sweet cake for Beck.
Here how I made my marshmallow fondant wave cake.
You will need to have:
1-2 packages of marshmallows, big or small.
2-5 tablespoons of water
About 8 cups of powdered sugar. 1-2 bags
vanilla, almond, or any kind of extract for flavoring
If you are doing all one color then go ahead and melt all your mallows in the same bowl. If you want to do a few different colors, split them up before melting them. Put your mallows in a microwave safe bowl and add 1-2 tablespoons of water. Stir them around until they are all slightly wet. Put a few drops of your extract in now. Add more water if needed, but just a little at a time. Place in the microwave on high for 30 seconds. Open and stir. Continue microwaving for 30 second until your marshmallows are melted.
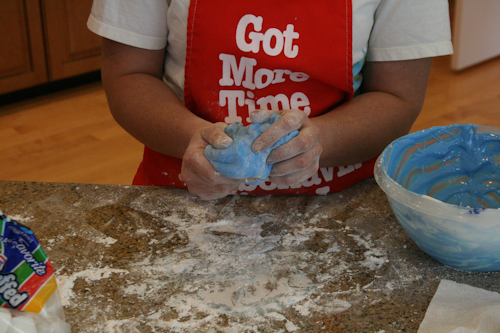
My apron says “Got more time for misbehave’n, since I started microwave’n.” Pretty sweet, I know 
Once they are melted, pour 1 cup of powdered sugar into the bowl. Mix until it thickens up. Spread powdered sugar on the counter. Take the fondant out of the bowl and start to knead it. It will be very sticky! My sister in law recommends putting shortening on your hands to help. She also adds about 1/2 cup to her fondant, but I didn’t. You can do it either way.
Keep kneading and adding powdered sugar until becomes a firm ball. It will still be a little sticky when it is stretched out. No worries. Place ball, double wrapped, in saran wrap over night. It will not be as sticky they next day.
When you roll it out make sure there is flour underneath to keep if from sticking to the counter. You will not see that side of the fondant. You might also need a little flour on the rolling pin, but if it shows on your top side just take a damp cloth and wipe it off.
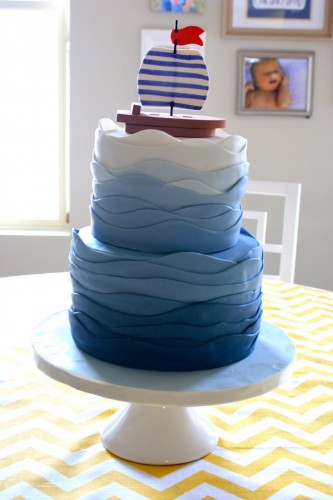
I was inspired to make these waves from this picture I saw on 6th Street Design School Blog. Check out this blog. It has a lot of beautiful stylish ideas for your home.
I love this beautiful wave cake, but I am not yet up to this kind of cake making par. So, I made just one tier. I used three different fondant colors. AND, I used a box to make my cake 
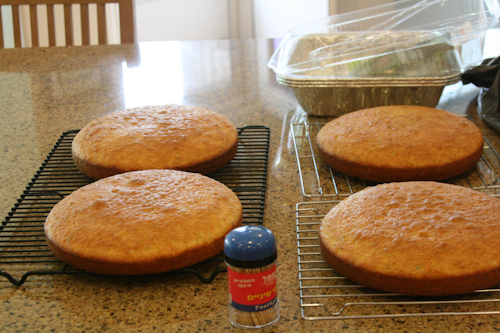
After making these and letting them cool for a bit; I trim off the tops to make them flat. I then layered them with frosting and home made raspberry jam.
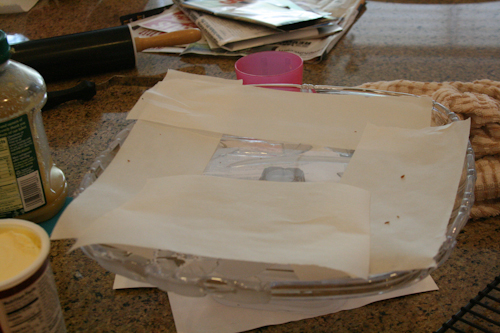
This handy tip I learned from Sandra Lee. Place some parchment paper like so on your cake stand. This helps to keep the cake stand clean and you won’t have to try to move it once it’s iced either. Place your bottom cake piece down and begin to layer on here.
Once you’ve completely iced the outside of your cake with a thin layer of frosting, you can place your fondant on. Roll out your fondant (if you haven’t already) and cut it wavy like with your pizza cutter. Start at the top of the cake and layer going down. This can be tricky, but hopefully the little layer of frosting you put on the cake will act like glue and hold the waves on. I also put tooth picks in the back of the cake, until the waves were secure. Once it is ready for the party remove the parchment paper by gently pulling it out from under the cake.
You can do it! Make a cool cake for your kid. Then proceed to do a happy dance. You deserve it. 
Nemo Party and Fun B-day Photo Idea
October 17, 2011 by Lynn
Filed under Birthday Parties, Featured Content, Holiday Crafts, Photography, Photoshop
My little man just turned two. He is crazy about Nemo. We threw him a Nemo themed party and here are some of the fun things we did:
When the kids first arrived they each got their own apron. (From the dollar store) And we made fish paintings with their hands. Since most of the kids where little the parents needed to help and we did it one step at a time.  We tried not to have too much paint on the table at once.
Beck is so proud of this painting. He makes sure I look at it at least once a week 
We then ate some good food!
The hubs used a permanent marker to trace it out then, craved the watermelon. Probably took 20 mins.
After eating we had a little scavenger hunt with fish cut outs hidden around the yard that had clues written on them.
It lead us to the “goodie bags.” The kids were stoked.
Then cake and ice cream of course. Beck is sooo cute.
Find How I made this cake and the Marshmallow Fondant Recipe HERE.
It was a fun party. Thanks for turning 2 Beck!
Should say age 2. But, here is something fun you can do with your child’s picture. Take a picture of them with enough space on one side so you can do some writing. Easy to do in Photoshop at a beginner level. Just choose the Type tool, front color, and write down what they love. You can do this 


