4 Ingredient Sweet Teriyaki Chicken Thighs
April 27, 2012 by Lynn
Filed under Featured Content, What's for Dinner?, Yummy Food
When I came home from the hospital after having my first baby a friend from church brought me this meal. IT WAS PERFECT! My baby was colicky and I had to be super careful what I ate. This was easy on me and the babe AND it tasted soo good! I know it wasn’t just the fact that all I had eaten for days was hospital food, this was really good. My husband made sure I got the recipe and we have been making it over the past four years. 
I still am not sure my friend has a name for this, so I just made up a name for it 😉 and will call it Sweet Teriyaki Chicken Thighs.
It is super easy too! This is a great meal for when you don’t have much time. Throw some rice in the rice cooker, broccoli in the streamer, and this in the oven. Waalaa, great meal everyone will love dinner.
All you need to do-
Preheat oven to 350 degrees
Put 1/2 cup sugar, 1/2 LOW sodium soy sauce, 1 cup of water, and 5-6 chicken thighs in a 9×13 baking dish. Bake for 30 mins or until chicken has an internal temp of 165. Flip chicken half way through…if you remember 
After the chicken is cooked, take out of dish and pour liquids into a pot on the stove top. Mix in a thickener, either 1 tablespoon of flour mixed into 1/4 cup of cold water OR 1 tablespoon of cornstarch with 1 tablespoon of cold water. Make sure it is mixed all the way before pouring it into the pot with the teriyaki liquids. With your stove on medium stir the flour or cornstarch mixture in until the liquids thicken up. Should take only a few mins.
Put chicken over rice and pour liquid over top. Done! EAT! 
AND EAT GOOD FOOD
Foaming Hand Soap
April 5, 2012 by Lynn
Filed under Cleaning, Featured Content, Home and Garden
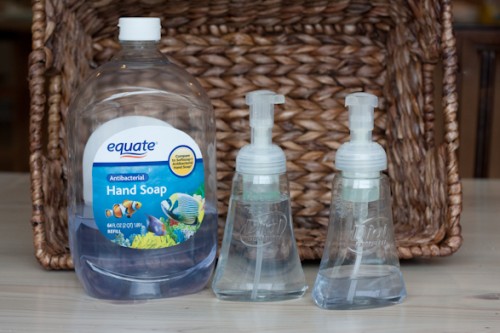
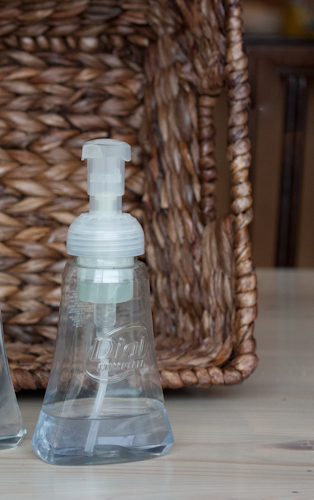
I used to buy the foam hand soap from Bath and Body Works till I vowed to try to be better at budgeting my moolaa. Now this is what I do. I bought a few of these Dial hand soaps from Walmart and I refill them about every 2 weeks. We seem to go through a lot of hand soap now that I have two little people running a muck.
We just use the bulk bottle of hand soap whether is from Costco or Walmart- where ever the best deal is or I am 
You can use any brand of bottled of hand soap as long as it has the foaming dispenser top.
We fill the bottle about a 1/4 to 1/3 full of the soap, then add hot water to the rest of the bottle. It needs to be hot to mix with the soap. Sometimes we add a dot of food coloring for the kids bathroom and let them choose the color.
So easy! So much less money running out my door…or down my sink. 
My Eastery Front Door Decor
April 5, 2012 by Lynn
Filed under Crafts, Easter, Featured Content
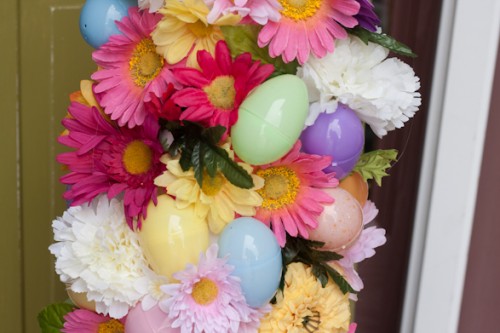
Easter!!! Deviled eggs, cute little chicks, chocolate covered children…such a fun day. I always love Easter and I love to decorate for it. I’ve definitely been in a slump decorating my house, but I did get around to doing the front door. Here it is!
I found some folding closet doors at the restore for $5 took them apart and painted them green. I made the bows using this pattern, click HERE. I just hot glued those, no sewing this time. I found the cardboard flowers at the dollar store along with the eggs on the topiaries and the fake flowers. I got the pots off KSL for $15 dollars and spray painted them. And the wreath I made a few years ago. You can find that tutorial and bunny pattern HERE
I didn’t want to spend a lot of money on making the topiaries and was having a hard time finding a cone shaped anything. So! I bought two pieces of poster board, rolled them up and glued them into a cone. I then went to town hot gluing on fake eggs and flowers. I think they turned out pretty great!
Burlap Easter Wreath
April 5, 2012 by Lynn
Filed under Easter, Featured Content, Holiday Crafts
This burlap wreath is a great way to decorate your front door for Easter.
You will need:
for wreath-
1 1/2 yards of burlap
14″ styrofoam wreath form
rotary cutter/scissors
spray bottle for wetting burlap, to help with mess
for bunny-
felt
hot glue
buttons, ribbon, flowers (whatever you like) to decorate bunny
I found this wreath on Craftaholics Anonymous (scroll to bottom of page).
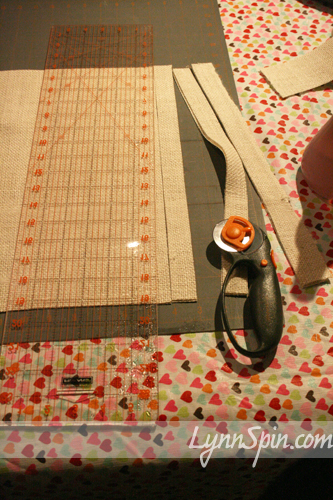
I thought if I added a cute bunny it would be a great Easter wreath. It was very easy to make, it didn’t take much time at all. I started by cutting a 3″ wide piece of fabric and wrapping it around my wreath form to cover the green. I think on Craftaholic’s they painted their styrofoam, but I wanted a little more uniform coverage.
Then I started to cut the 1″ by 16″ strips of burlap.
Then I tied them around the form using double knots. I tried to get the pieces as close together as I could.
After I had the whole thing tied, I started on my bunny. I cut the shape out of felt, wrapped a tulle bow around its neck, added some flowers and WaaLa!
Click here for free bunny shape/pattern. Right click link and choose “file/link/target as” then open and print. Or if you click on the link, go to “save image as”
I added a little bit of super stiff felt on the back of the bunny, then hot glued it to the wreath. I glued a 9″ piece of ribbon to the back of the wreath and hung that bad boy on my door! Bam!
Get Crafty With Your Bad Self On The Holidays! Watch Out Now!
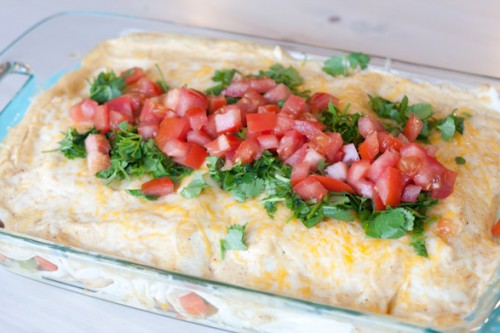
Lynn-chiladas -White Sauce Enchiladas- YUM!
March 25, 2012 by Lynn
Filed under Featured Content, What's for Dinner?, Yummy Food
My mom, sisters, and I used to travel down to Oregon from good ol’ Puyallup Washington to visit my Great Aunt Mary. She would make us the best food! I loved her cooking. I tried a lot of delicious things at her house, things I hadn’t had before. Like the first time I had a homemade strawberry milk shake, soo good. I thought I was in heaven. One night she made these white sauce chicken enchiladas. I probably ate half the pan full. I loved them, like everything else my aunt made, and begged my mom to get the recipe.
This stayed my favorite home cooked meal clear through my first child was born. Then, for some strange reason I stopped making them. I kinda forgot about them…weird. But, last week I had a major 4 1/2 month pregnancy craving for them. I went to the store and bought all the goods. I have never used a measuring devise of any kind to make this, I know this recipe by heart and by eye. I did however make sure to measure it all out this time so I could share the goodness with you.
I have not just loved eating this dish, but also making it. I am not sure why, but it’s one of those dishes that just makes me feel happy inside to make. Maybe all the good memories I have with of traveling to my aunts house and my memories with her. Maybe all the times my mom cooked it “just” for me or the times I cooked it and shared it with good friends. I made it so much in college (partially it was one of the only things I knew how to cook) that my friends dubbed them “Lynn-chiladas” haha.
I hope you and your family can enjoy this dish as much as I have. 
To get a printer friendly version of this recipe click HERE. This will take you to box.net where you can print the recipe to your home computer.
“Lynn-Chiladas”
White Sauce Enchiladas
1lb chicken
½ medium onion
1 tablespoon olive oil
½ teaspoon seasoning salt
4 carrots chopped
2 bell peppers (any color)
8 large tortillas
2 cups shredded cheese, Mexican mix
1 cup sour cream
1 10.5 oz can of Cream of Chicken soup
½ teaspoon chili powder
1/8-1/4 cup of milk
½ cup chopped cilantro
½-1 tomato
Pre-heat oven to 350 degrees.
Warm a pan on the stove with olive oil. Cut the chicken into bit size pieces. Add chicken, chopped onion and seasoning salt to pan. Cook the chicken through.
Chop carrots small. Add the carrots to pan and cook for about 7 minutes.
Cut bell peppers into strips and add to pan. Cook for another 5-7 minutes.
Take off stove. To make the sauce, in a bowl mix together cream cheese, cream of chicken soup and chili powder.
Set up an assembly line in this order: tortillas, sauce, chicken and veggies, and shredded cheese.
In a 9×13 dish spread about ¼ -1/2 cup of sauce on bottom of pan.
Take your tortilla, spread sauce, a scoop of chicken and veggies, and then sprinkle on cheese.
Roll up your tortilla and place in pan seam side down. Your pan should fit about 8 rolled up tortillas.
Mix milk into remaining sauce and add to the top of the tortillas.
Cook for 20-25 minutes. Take dish out and add remaining cheese to the top of the dish. Place dish back in oven until melted, about 3-5 minutes.
Chop up tomato and cilantro and to the top of the dish after it has cooled for a few minutes.
Serve and ENJOY!
Get Cook’n with Your Bad Self!!!
Gray and Yellow FREE Prints
March 20, 2012 by Lynn
Filed under Decorating, Featured Content, Home and Garden, Typography
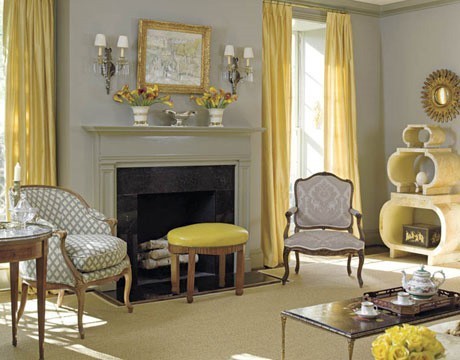
Gray and Yellow are super popular lately. They are everywhere from baby rooms, living rooms, teen rooms, and weddings.
Everybody is loving the yellow and gray!
As seen in these beautiful room pictures I found on Pinterest …. of course. 😉
Picture from Google images.
Picture from My Revelment
From Tis So Sweet Blog
From Desire to Inspire
From Apartment Therapy
Two of my good friends are redoing rooms in their homes with this gray and yellow theme. I always LOVE to help a friend decorate and asked if I could create some prints for them.
One friend is redoing her daughters room who is a teenager. These are prints she wanted and a few variations for you to choose from too.
PLEASE NOTE: The links to print these will take you to BOX.NET where you can download each image to your computer then print on your own. I recommend printing at Costco, cuz it’s easy. But please make sure you upload in “full resolution” and click “DO NOT AUTO CORRECT”
These are all 8×10’s
Have fun!
My other friend asked if I would make some airplane prints for her soon-to-be little boys nursery. Since I can’t be at her shower I was more than happy to do it. 
These are all 10×8’s
Note! I am not sure why the colors are showing up different on this one. It should print fine.
Have fun decorating!
Jute Piping=Much Better!
March 20, 2012 by Lynn
Filed under Featured Content, Furniture Redos, Home and Garden
Okay, so here is the first before picture!
I bought these chairs at an estate sale in San Diego about 4 years ago. And they looked liked this till about 6 months ago.
I took them apart and used the fabric as a pattern.
Then I made yellow piping and the chairs looked like this….
Then my sister came to visit and told me they made her hungry for Mexican food.
Soooo!
Now the chairs look like this!
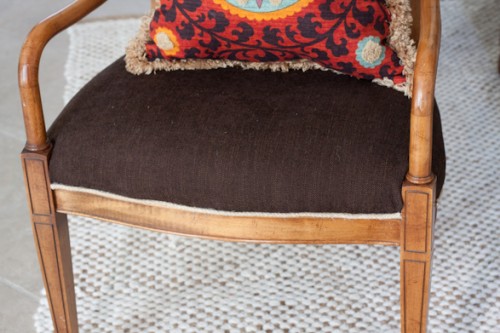
I did a flat braided jute around the top and a pre-made jute piping around the bottom.
I bought both of the different jutes at Walmart. And, yes I hot glued it on. That IS what the pro’s do just so ya know. Some lady laughed when I told her I used hot glue….go talk to your local upholster if you are unsure what to do in any part of the process of redoing your chairs. They are usually more than happy to share some trade secrets and help you out.
I think it looks MUCH BETTER!
Making my house feel more like home!
Does This Make YOU Hungry?
March 9, 2012 by Lynn
Filed under Featured Content, Furniture Redos
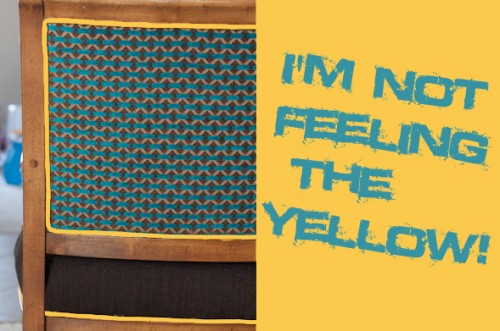
I tried really hard to find a color for piping that would help my chairs pop. I decided on a mustard yellow…. it’s not popping the way I was hoping. ALL that work of making piping! Ugh…
I asked my sister, who was visiting over Christmas, what she thought. I was trying to convince myself to just finish them and not change the pipping.
When! She said, “Kinda makes me hungry for Mexican food.”
Uh…. haha, not what what I was hoping to hear, but TRUTH people! Dang it!
So!! Stay tuned for Monday when I reveal the final changes!
LYNN WHERE HAVE YOU BEEN??!!
February 8, 2012 by Lynn
Filed under Featured Content, Mom Thoughts
WELL…..I have been building a baby in my belly! Yay! But, that building has sucked the life out of me. So the projects I had started and wanted to share with you, got pushed in the garage and have not yet emerged.  I LOVE to create and design, but I am on hold doing any projects at the moment. I have to keep reminding myself that I am creating something even more special.
I’ve have been really sick this time around and am struggling to keep my head above water, so to speak. So! I will be back soon helping you get crafty with your bad self and hopefully inspiring you with some fun ideas for your home.
Don’t give up on me! I love my blog followers and have much to share with you soon!
Simple Clean Living Blog and Cranberry Salsa
December 16, 2011 by Lynn
Filed under Featured Content, Friday Feature, Snacks/Appetizers, Yummy Food
Simply Clean Living is a blog written by a good friend of mine, Katie. I love her tag line, “Organizing life and surviving motherhood, one late night at a time” She has everything from great craft projects to do with your kids, money saving tips, organizing tips, yummy recipes, and thoughts on motherhood. I love Katie’s stories about motherhood and the way she writes. Here is one of my favorite posts of hers, that I needed after one hard day. It’s called “Down and Dirty: Motherhood Real-Life” READ HERE
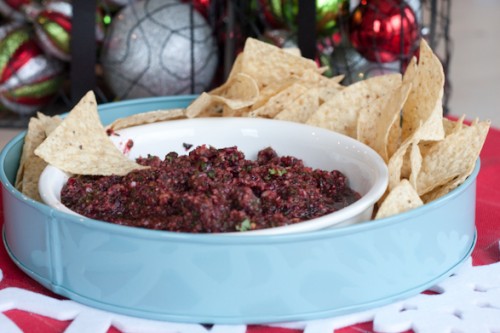
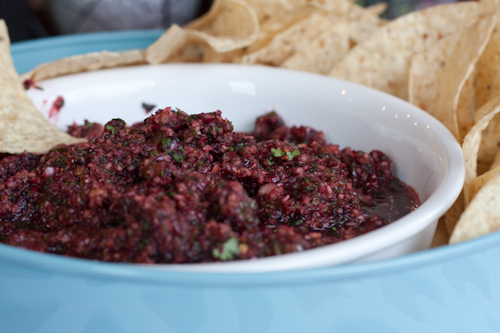
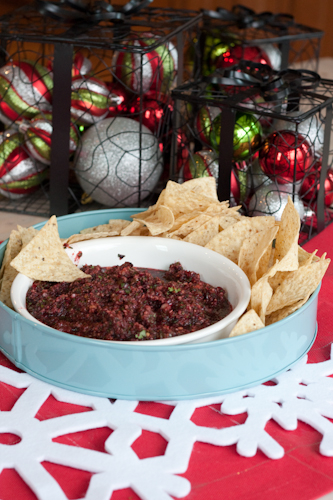
Also here is a super good salsa recipe she shared last week. I remember her bringing this one Thanksgiving 3 years ago and I think I have craved it ever since. It is good! And it’s great to take to a holiday party.
Cranberry Salsa
Katie has provided a Printable Version here
Ingredients
- 1 (12 ounce) bag of fresh cranberries
- 1 bunch cilantro, chopped
- 1 bunch green onions, chopped
- 1 jalapeno pepper, seeded and minced
- 2 limes, juiced
- 3/4 cup white sugar
- 1 pinch salt
Combine cranberries, cilantro, green onions, jalapeno pepper, lime juice, sugar, and salt in the bowl of your food processor, and chop to desired consistency. Our food processor is not big enough for this entire batch at once, so I mix it in a bowl, and then put it into the food processor in batches. This salsa is best made the night before or a few hours before, and refrigerated so that the flavors have a chance to blend, but do not make more than a day in advance. Serve with tortilla chips.


